

Schedules used to be created only in the browser, and from the phone you could just look at them. In version 2.1.0 the app got the full wizard — the same four steps and the same five schedule types as in the web version.
Schedules can be created by the manager, the administrator and the company owner.
Step-by-step instructions
How to open it
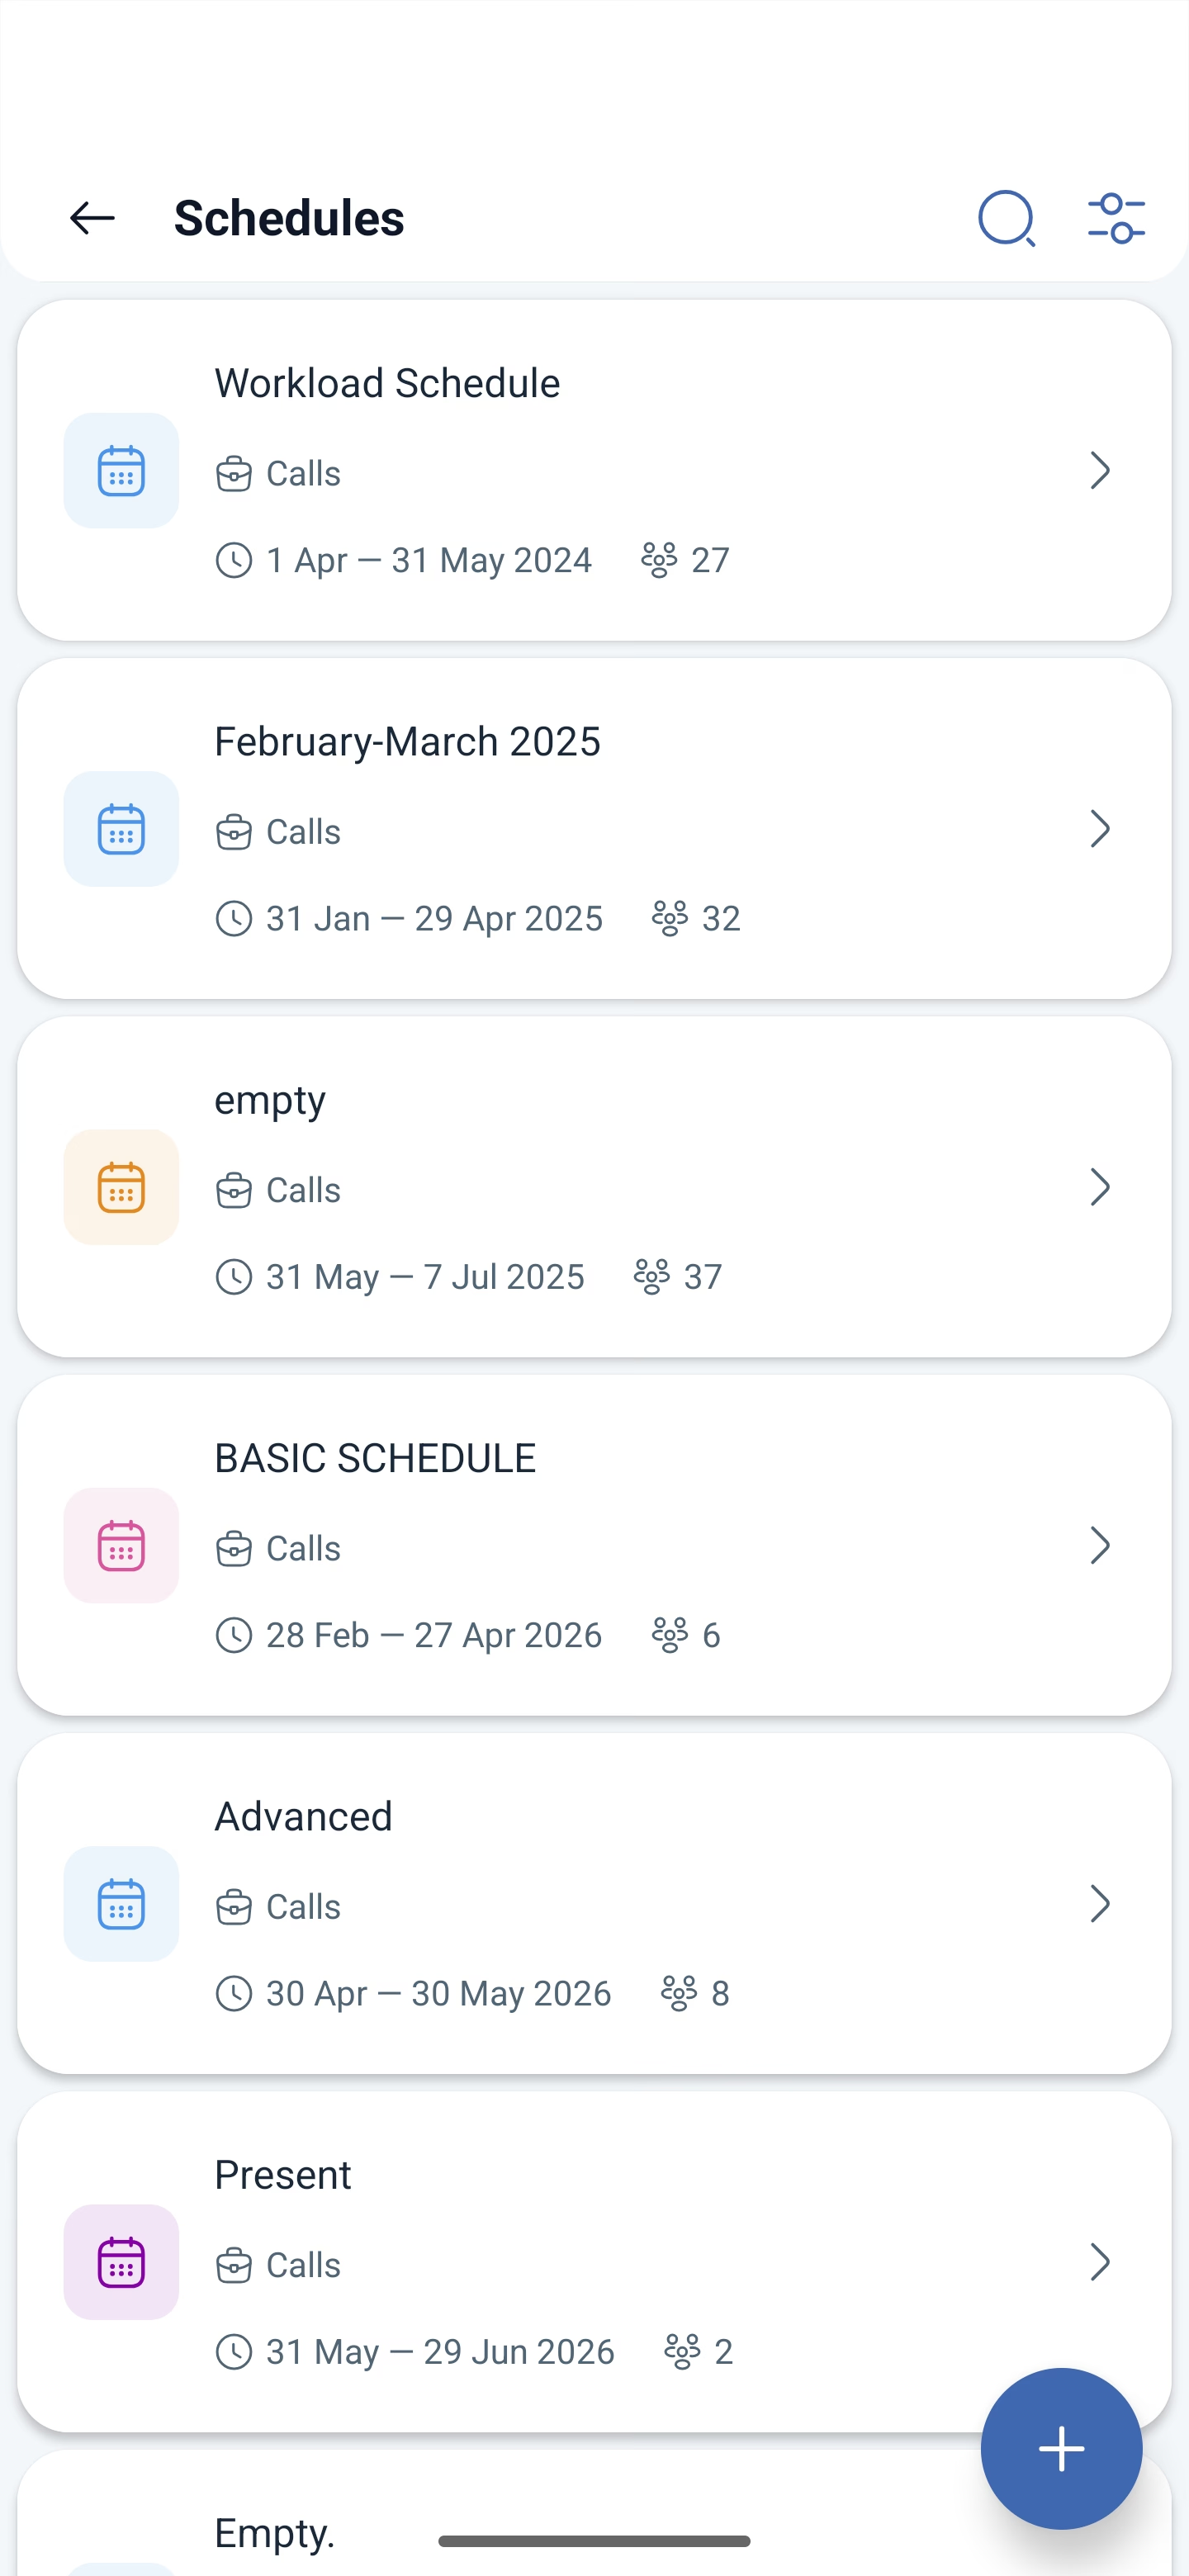
Press ☰ in the bottom bar → Schedules → Schedules. The list of company schedules opens: each one shows the name, the project, the period and the number of shifts. In the bottom right corner is the Create schedule button.
Step 1. Main information
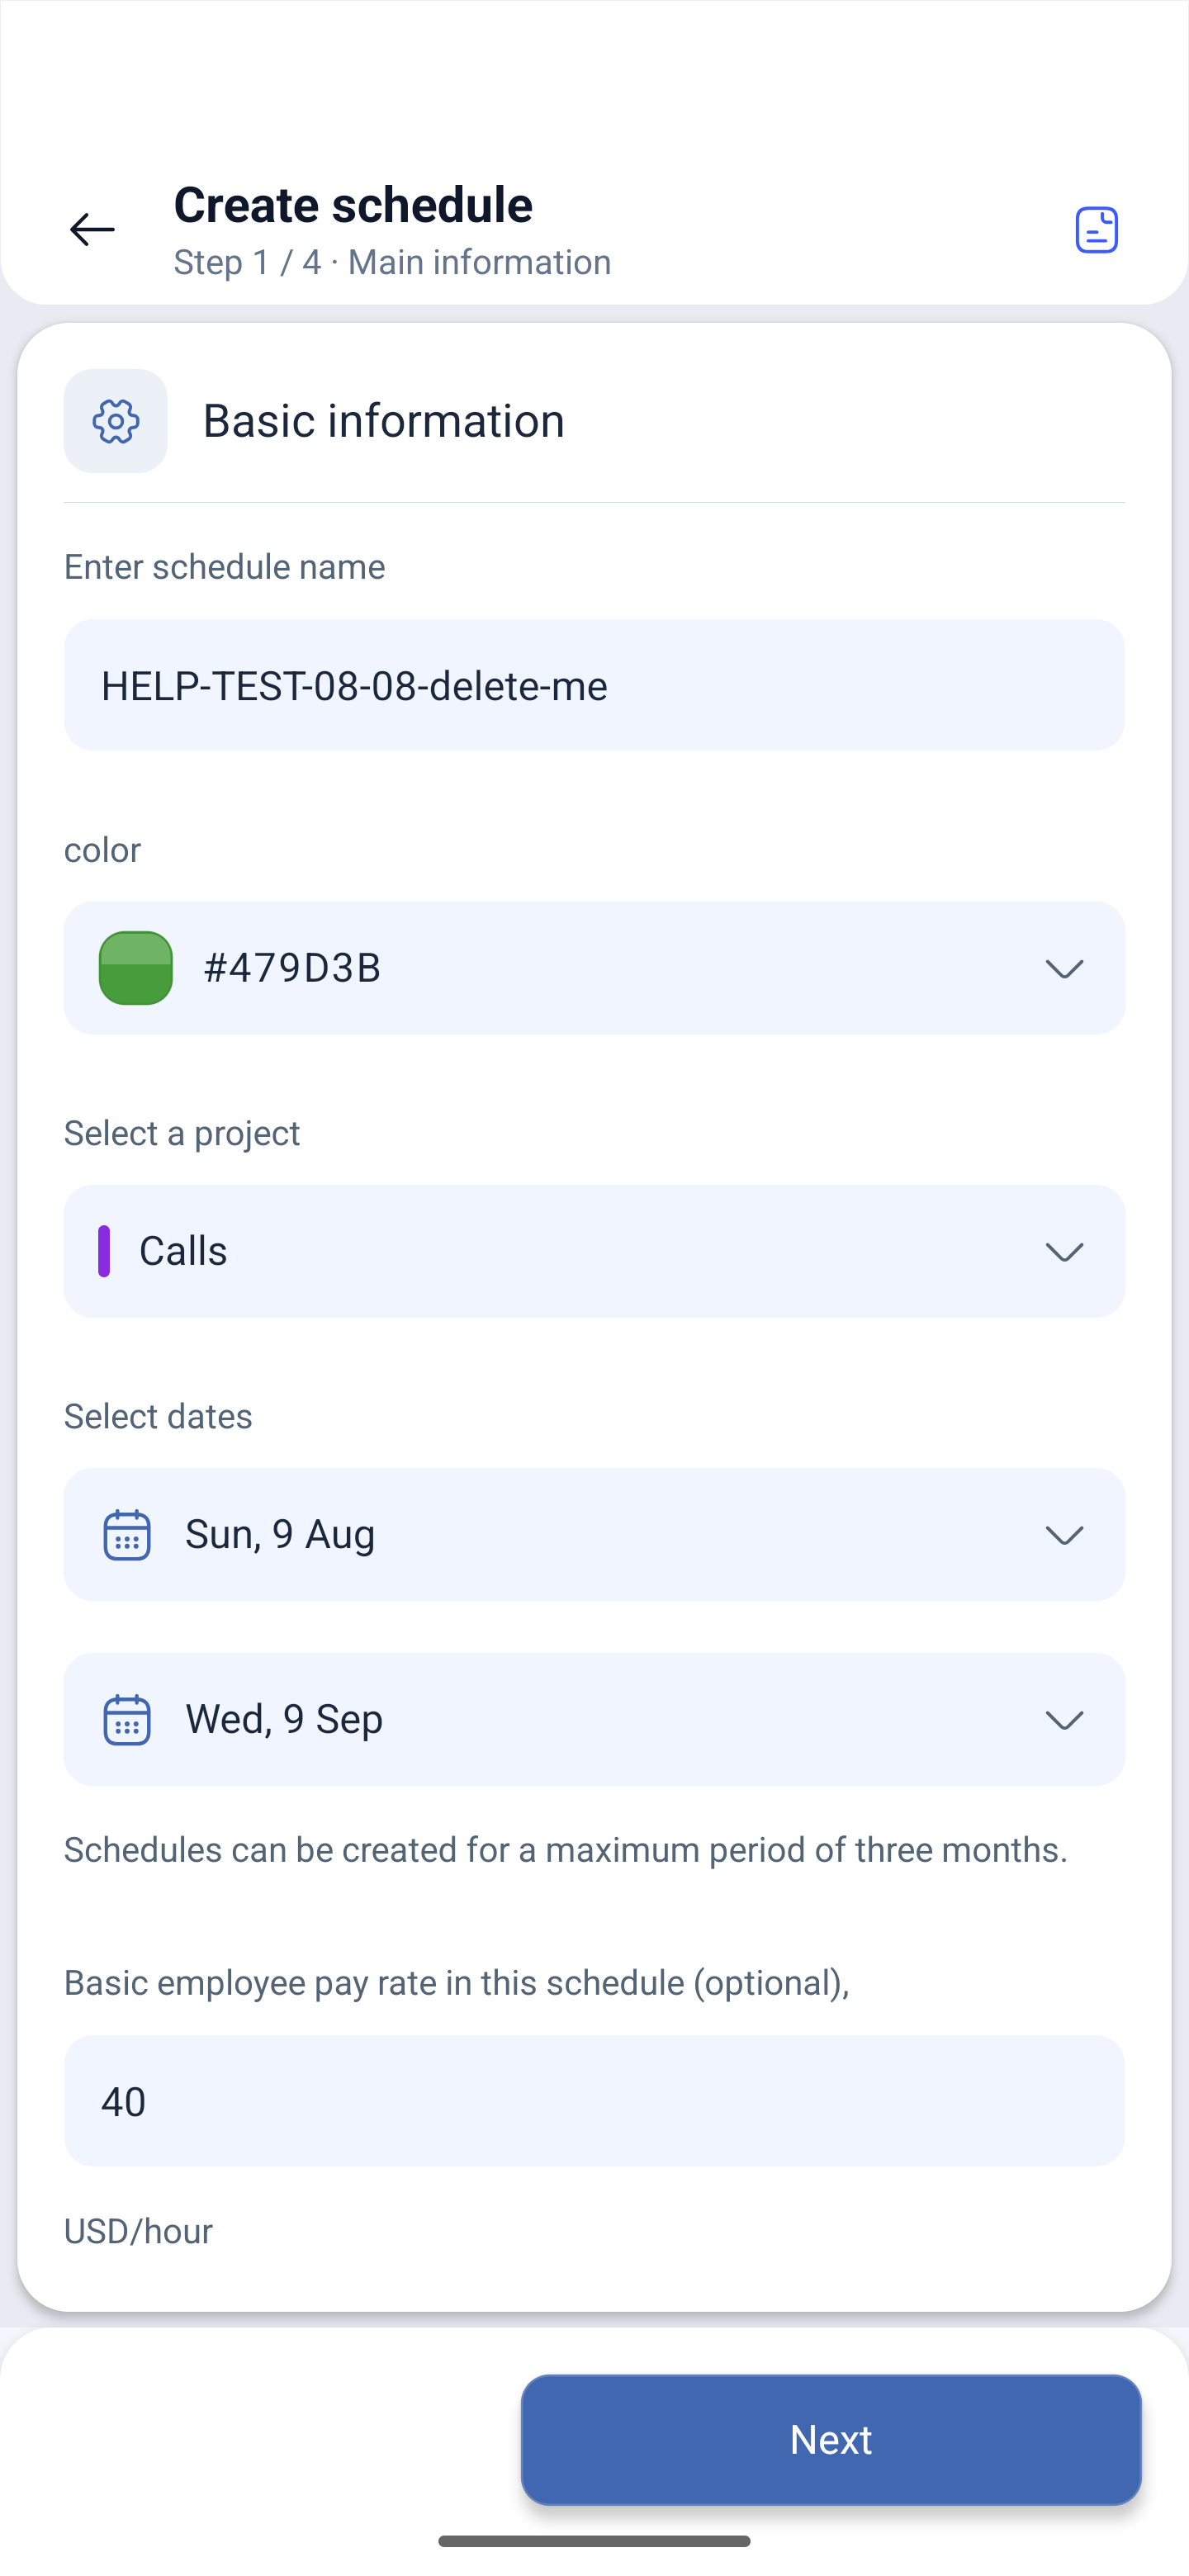
| Field | Description |
|---|---|
| Enter schedule name | The name of the schedule |
| Choose a color | The color that marks the schedule in the list and in the grid |
| Select a project | The project the schedule belongs to |
| Select dates | The start and the end of the period |
| Basic employee pay rate | The basic pay rate for this schedule, optional |
| Select week control type | How the system treats overtime: Allow, Allow with confirmation, Block |
The period is limited: a schedule is created for three months at most. This is stated right under the dates.
Step 2. Schedule type
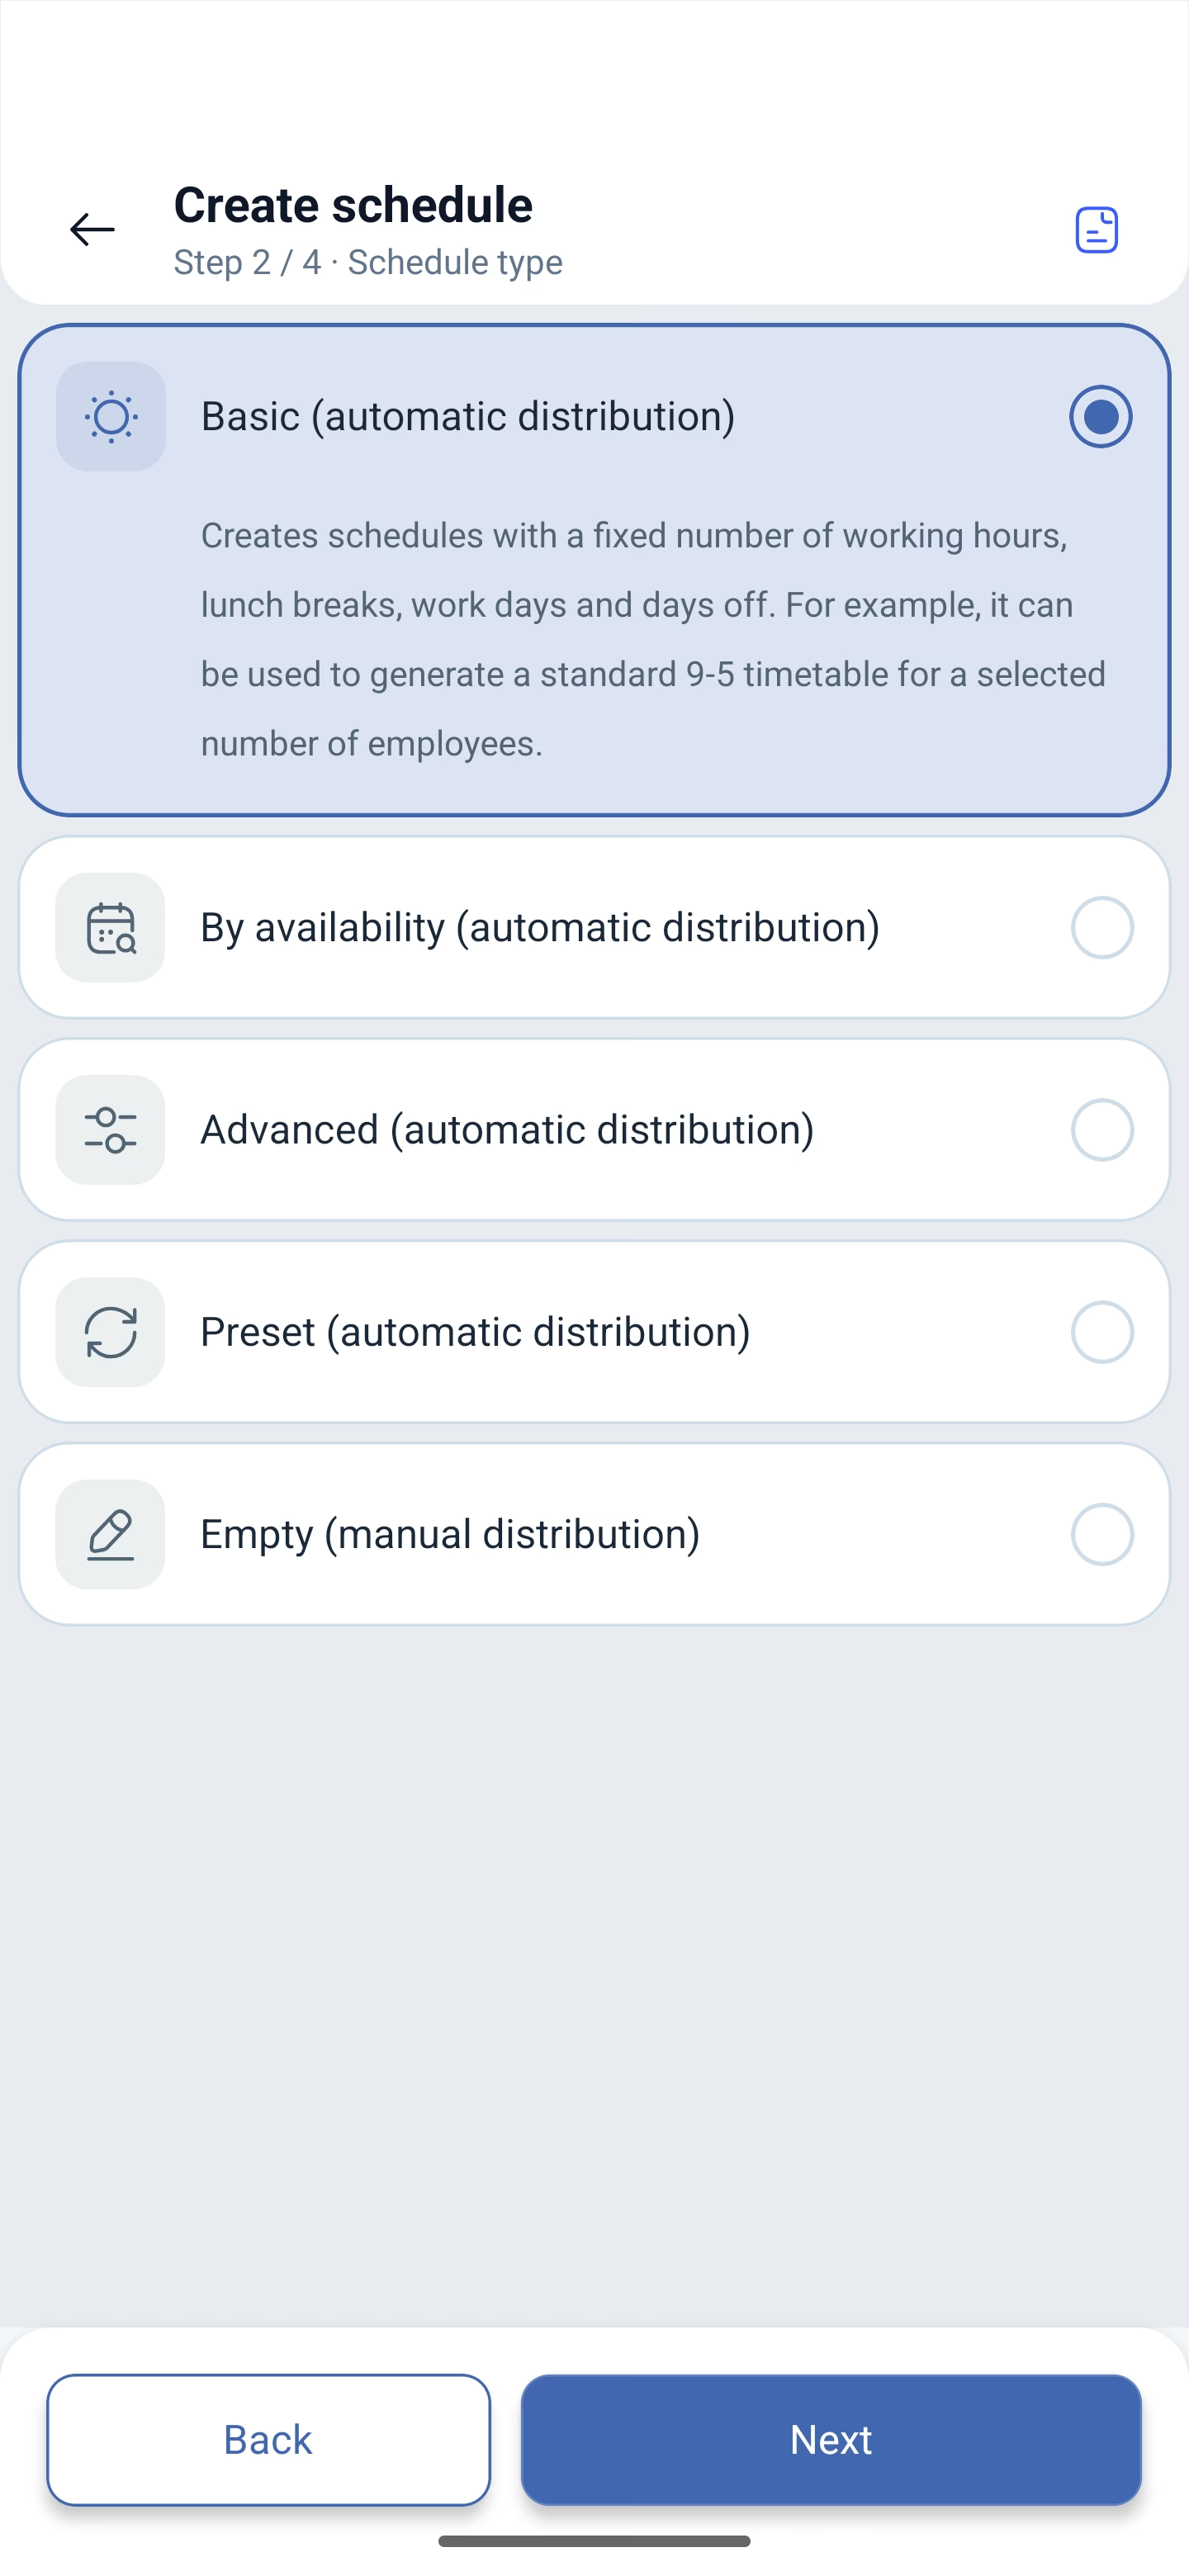
Five types, the same as in the web version:
| Type | How it is filled in |
|---|---|
| Basic (automatic distribution) (Basic (automatic distribution)) | A fixed number of working hours, the system places the shifts itself |
| By availability (automatic distribution) (By availability (automatic distribution)) | By the availability employees have specified for themselves |
| Advanced (automatic distribution) (Advanced (automatic distribution)) | A different number of work places for different shifts |
| Preset (automatic distribution) (Preset (automatic distribution)) | By rotation: 2/2, 5/2 and similar ones |
| Empty (manual distribution) (Empty (manual distribution)) | An empty schedule, you place the shifts by hand |
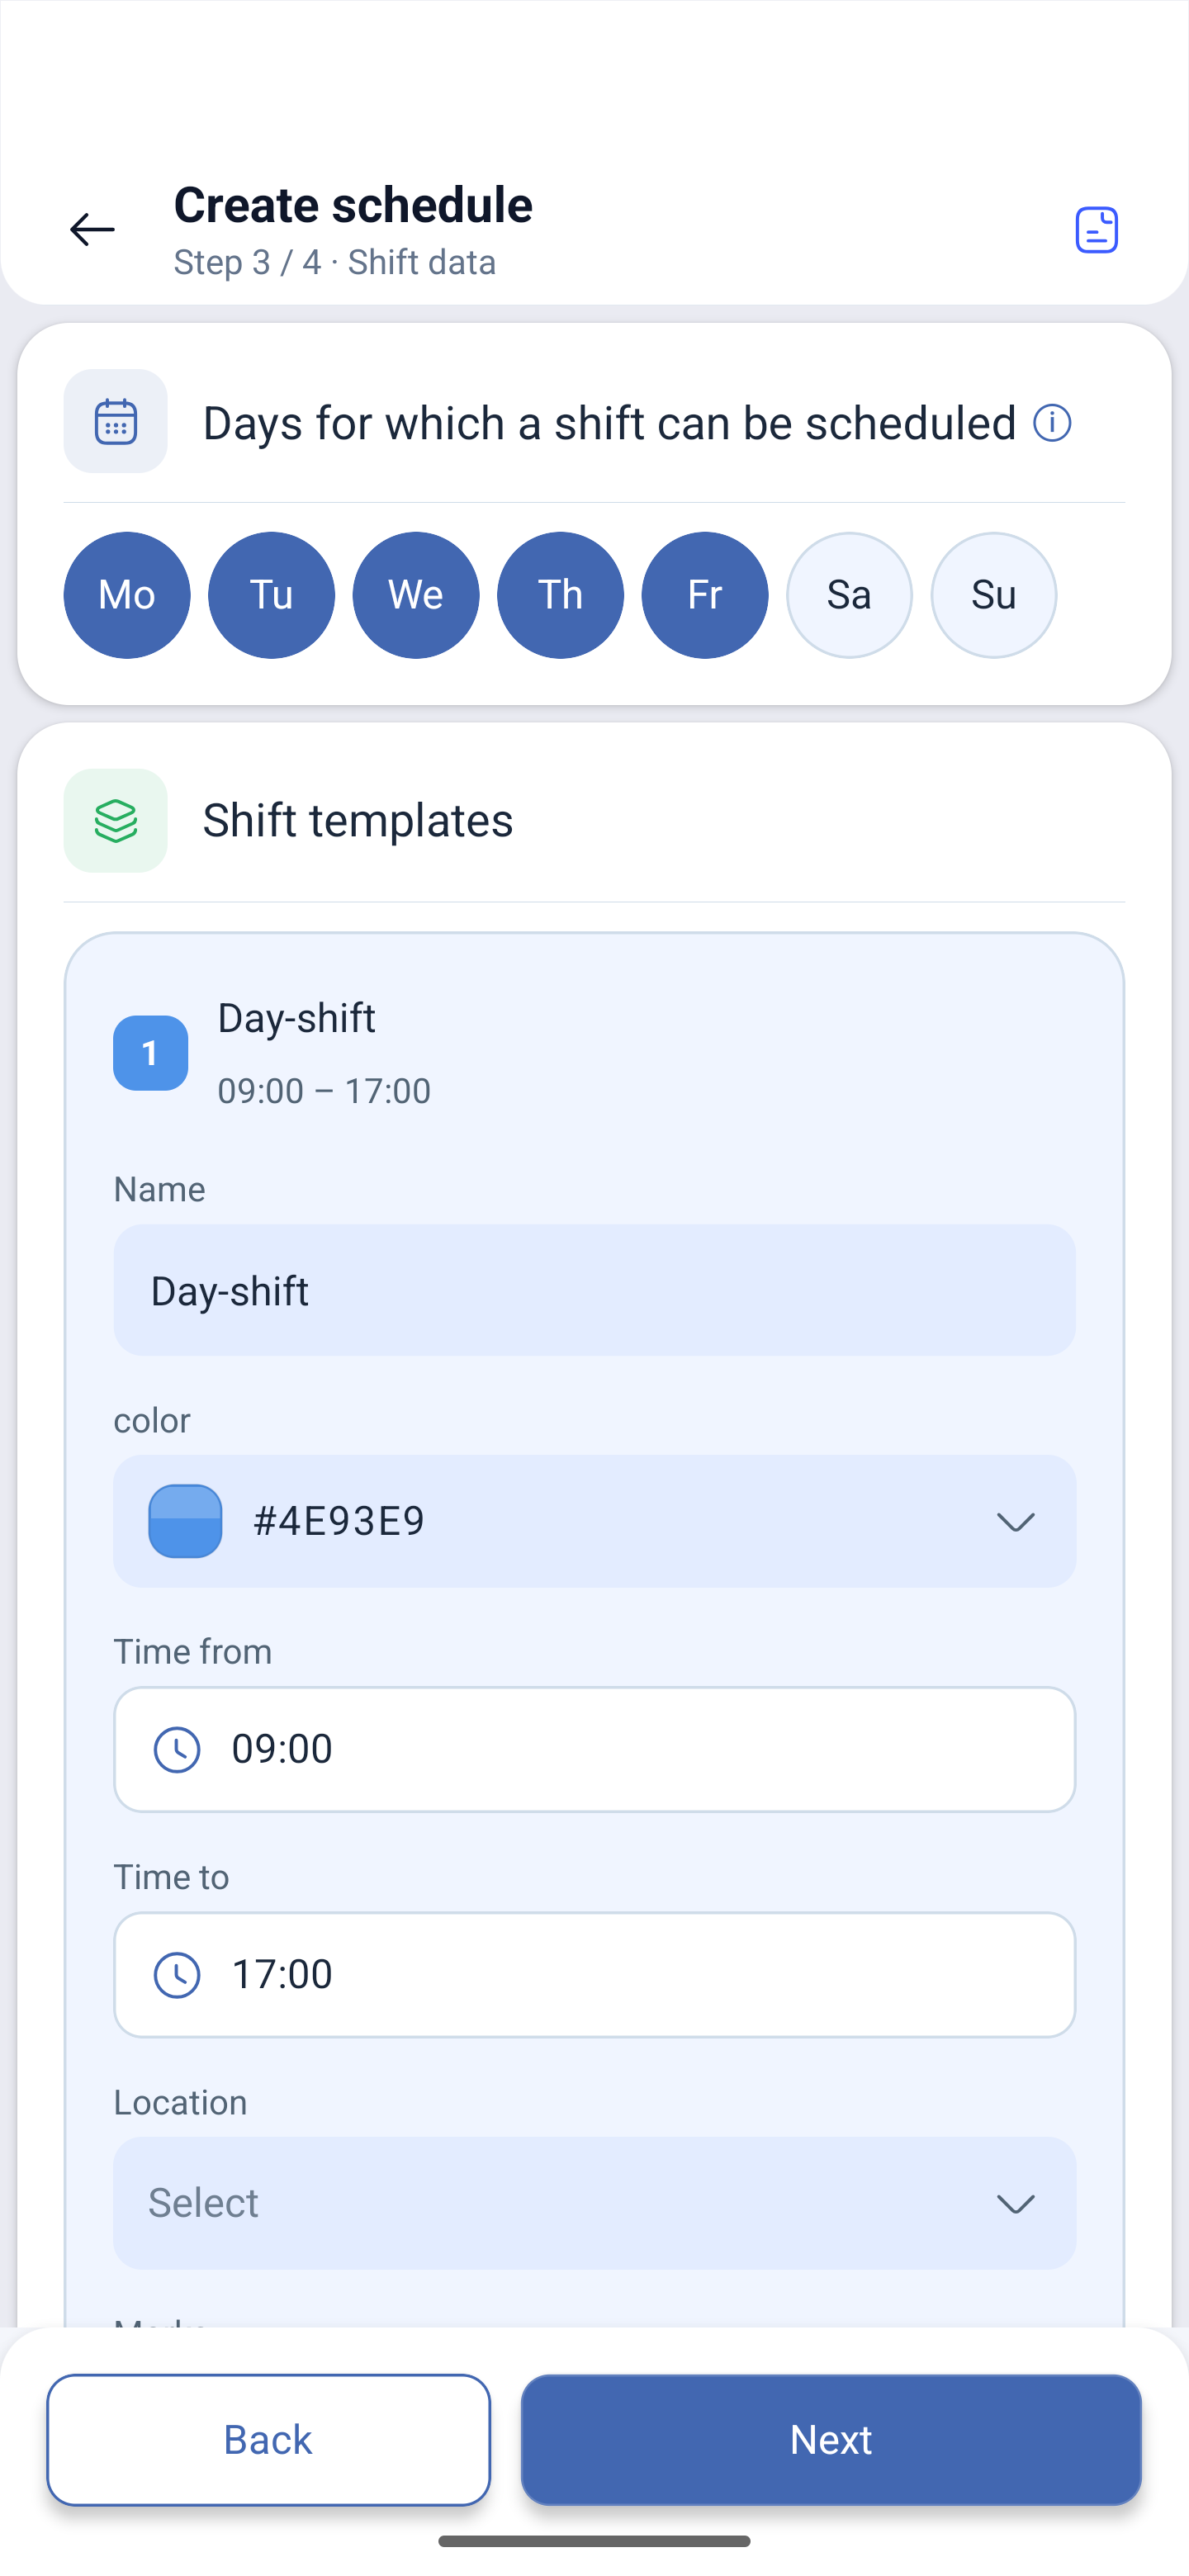
Step 3. Shift data
First you mark the Days of the week on which shifts can be placed at all. By default Mo–Fr are marked.
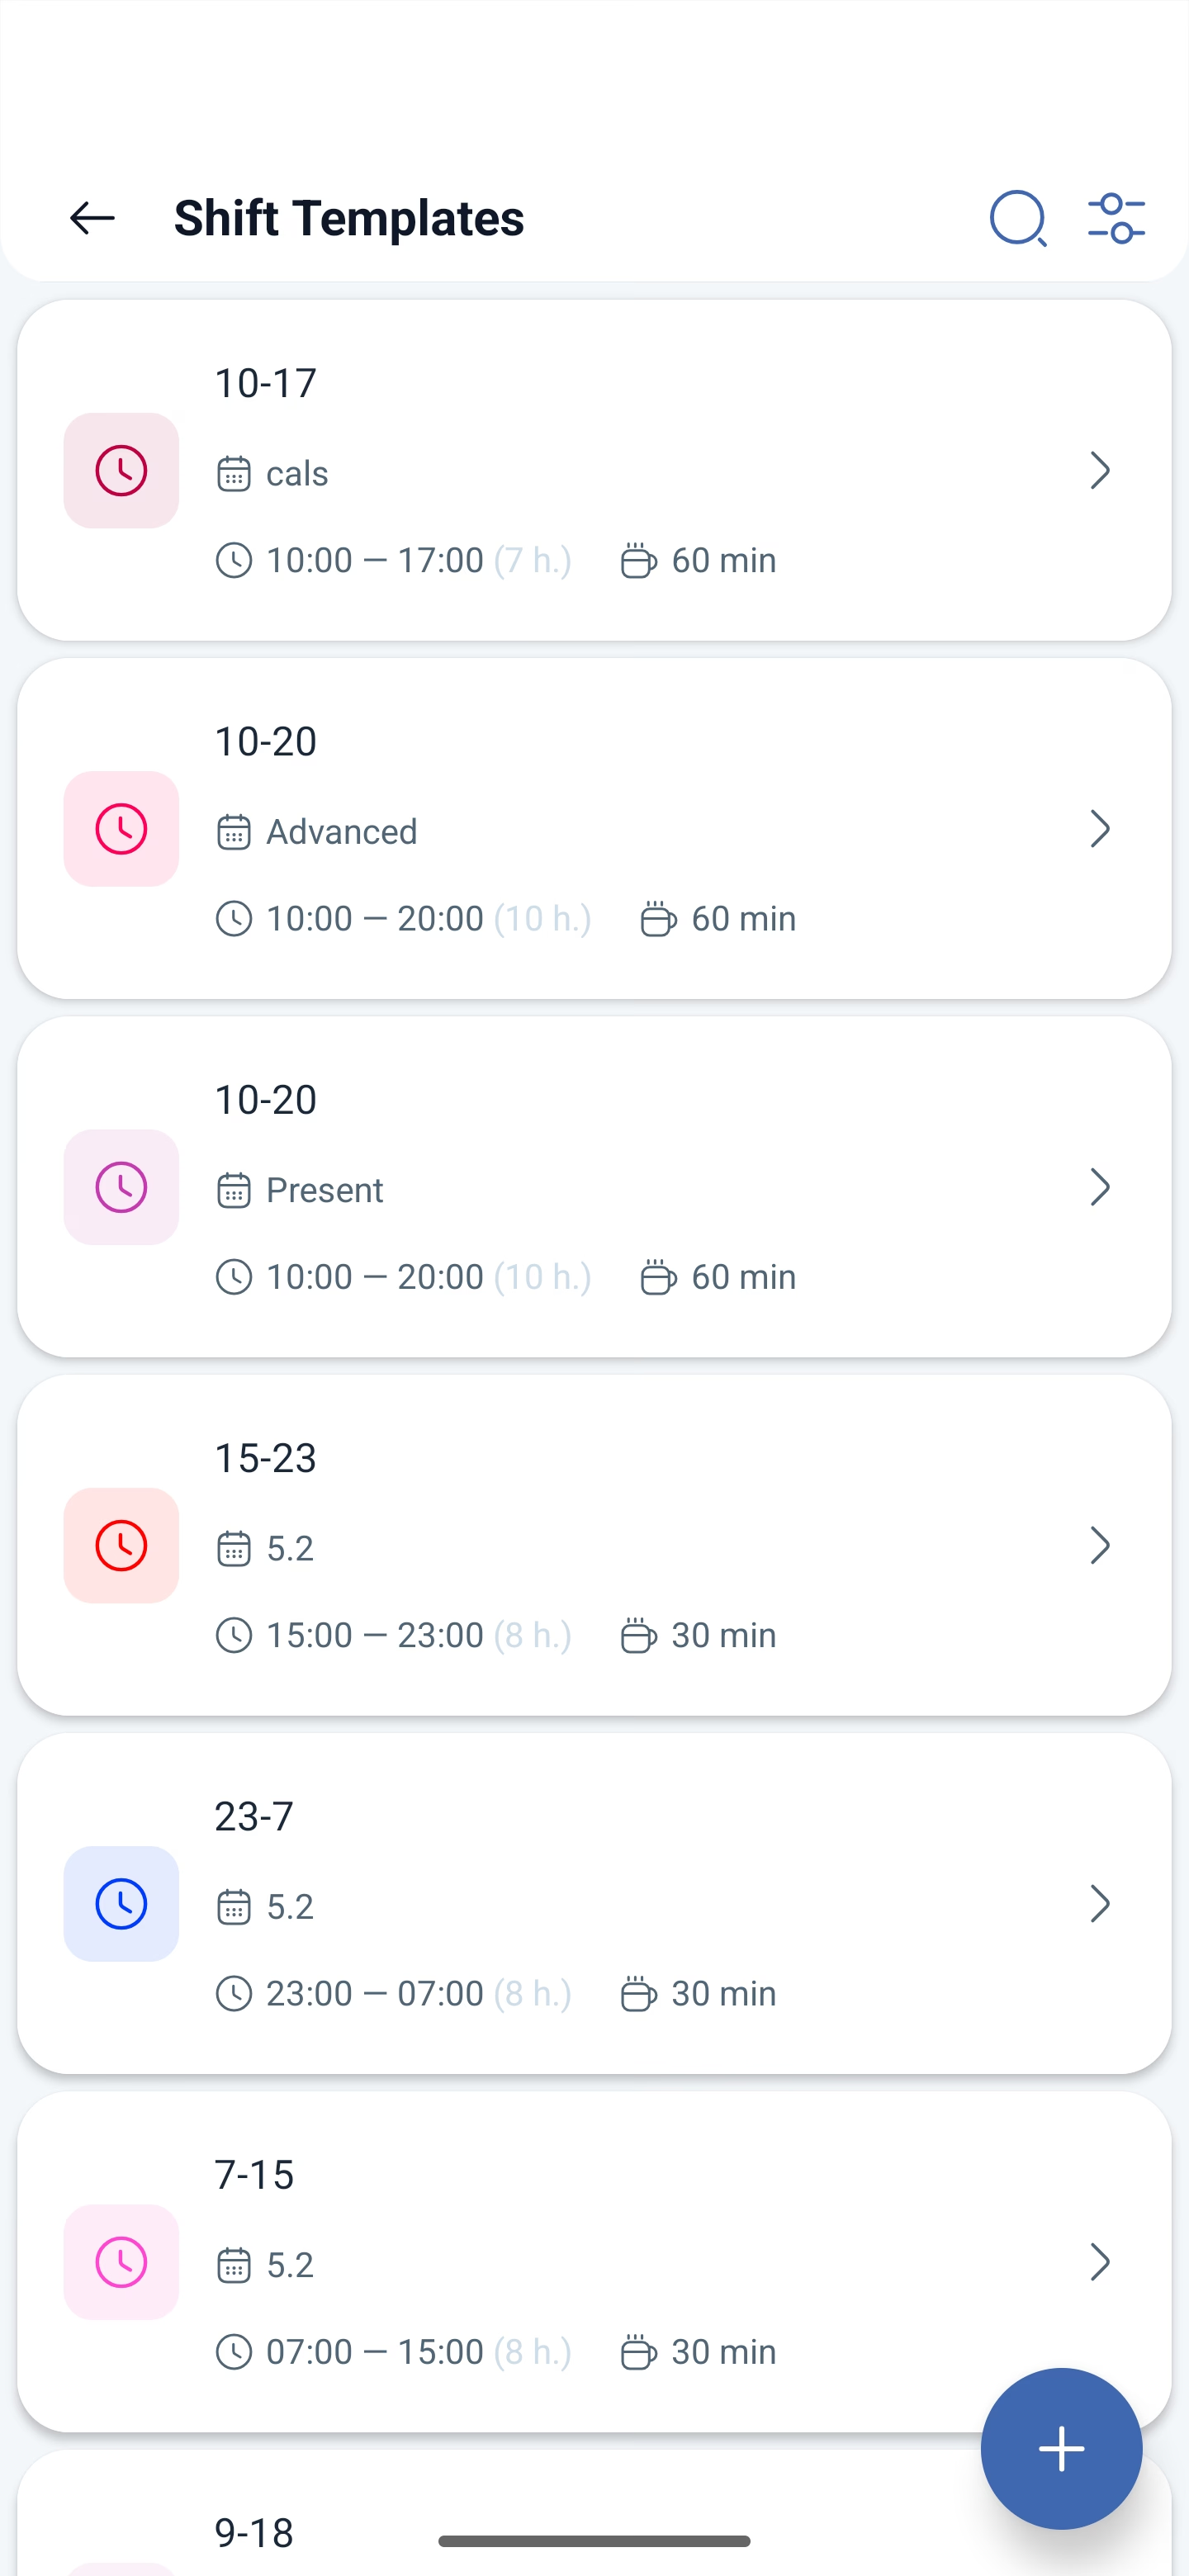
Below are the shift templates. For each one you set:
| Field | Description |
|---|---|
| Title (Name) | The name of the template. Required — without it the wizard will not let you go further and shows “Name is required” |
| color | The color of the shift in the grid |
| Time from / Time to | The start and the end of the shift |
| Location | The work location, optional |
| Marks | The shift marks, optional |
| Break | The break inside the shift |
You can add several templates — for example, a day one and a night one.
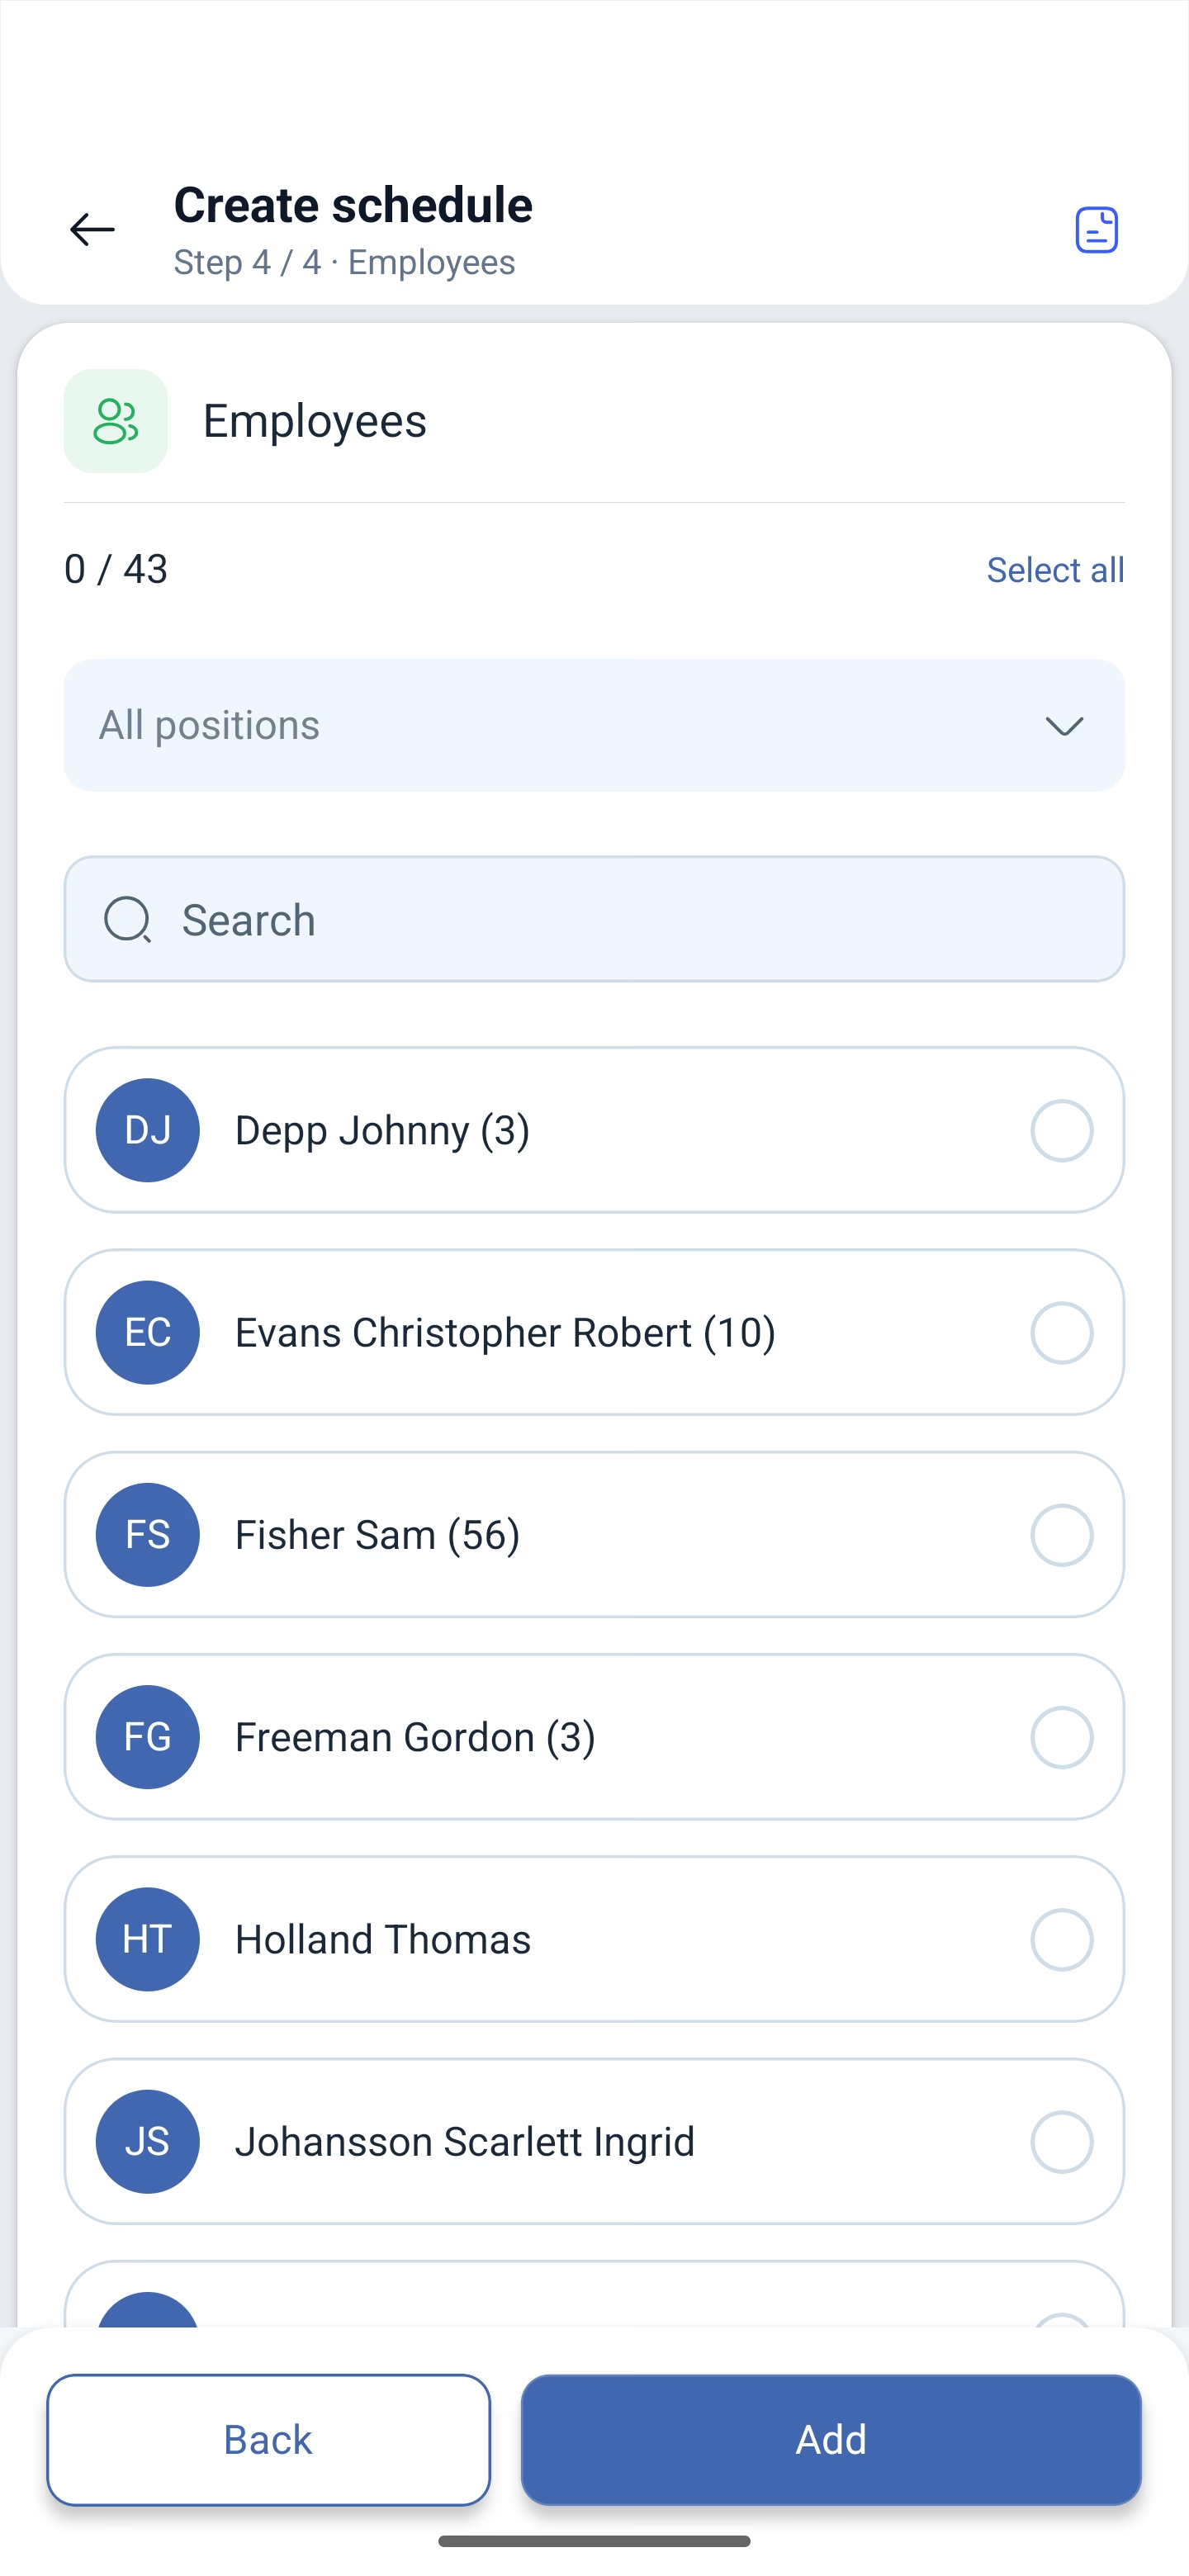
Step 4. Employees
The last step is who to put into the schedule. At the top there is a counter of the selected out of the total number of employees and the Select all button. There is a filter by position and a search by name.
The button in the bottom right corner is called Add — that is what creates the schedule.
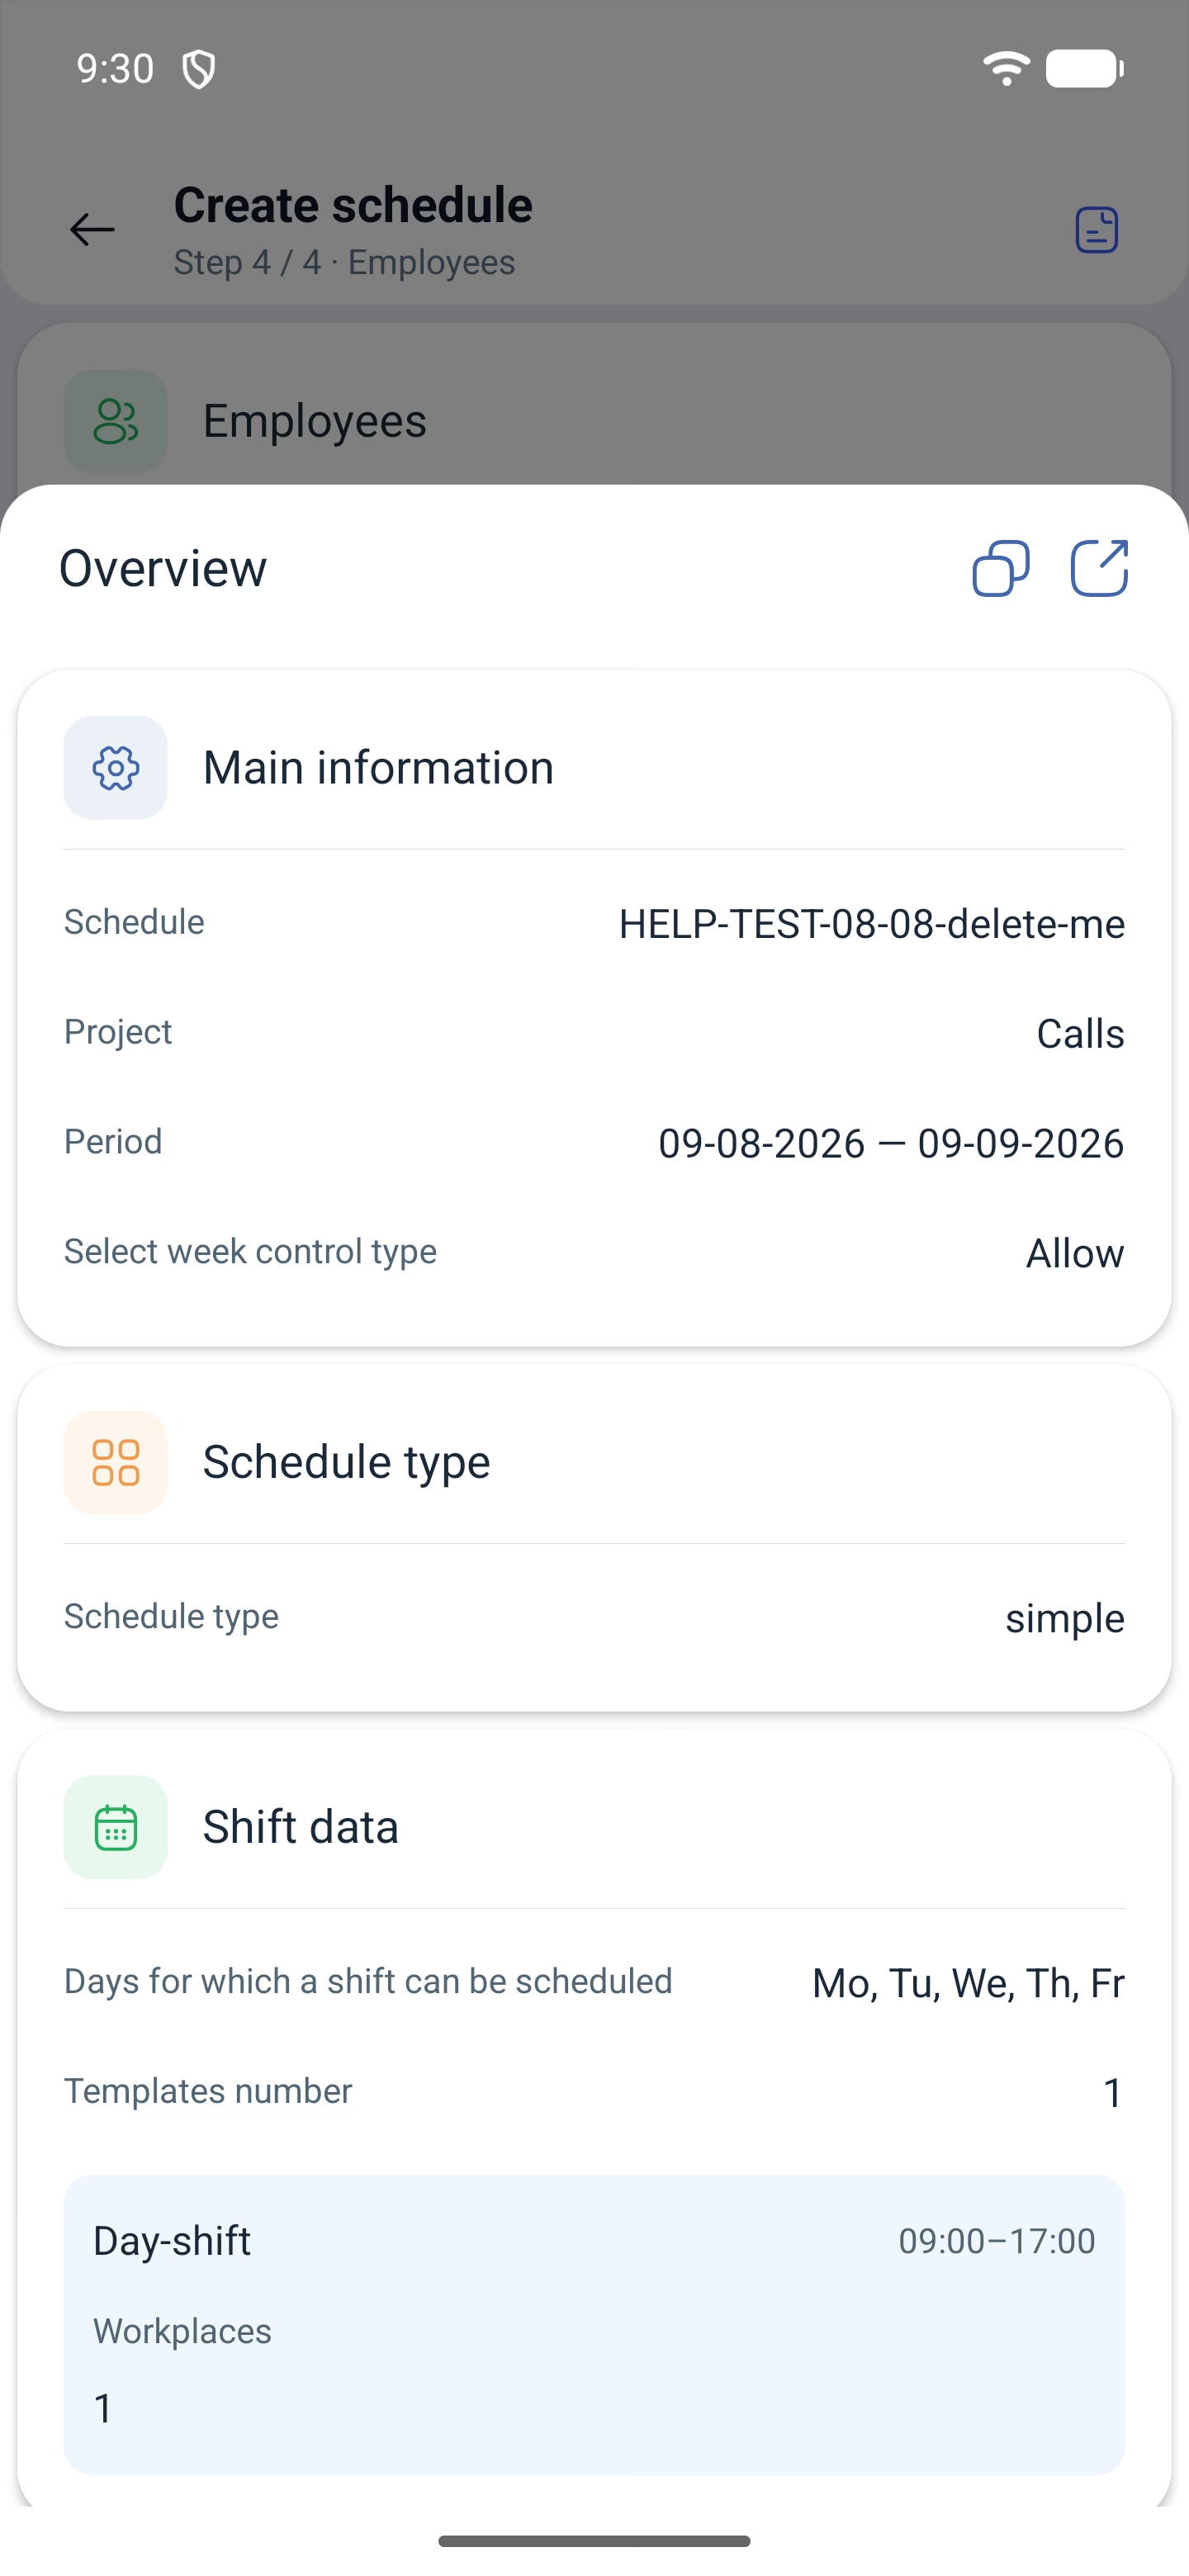
Summary before creating
At any step you can press Overview in the top right corner and see everything that has been set already: name, project, period, week control type, schedule type, marked days, the number of templates and work places. From here the schedule can also be duplicated (Duplicate) or shared (Share).
Possible problems and solutions
| Problem | Cause | Solution |
|---|---|---|
| The Next button does not work on the third step | The shift template has no name filled in | Fill in the Title — a hint “Name is required” appears under the field |
| A period longer than three months cannot be set | A system limit | Create the next schedule separately or extend this one through Reduce/extend schedule |
| An employee is not in the list on the fourth step | They have not been added to the selected project | First add the employee to the project, then come back to the schedule |
| The Create schedule button is not visible | You are logged in as an employee | Creating schedules is available to the manager, the administrator and the owner |
Frequently asked questions (FAQ)
Question: Is the wizard in the app the same as in the browser? Answer: Yes — the same four steps and the same five schedule types.
Question: Can several shift templates be added at once? Answer: Yes, on the third step you add as many templates as you need.
Question: What if I need a schedule longer than three months? Answer: Create it for three months and then extend it through Reduce/extend schedule in schedule editing.
Question: Is the pay rate mandatory? Answer: No, the field is optional. If you leave it empty, the rates from the company and position settings apply.
Question: What does “Select week control type” mean? Answer: How the system behaves with overtime. Allow permits it silently, Allow with confirmation marks the shifts for confirmation, Block marks the excess as a problem but does not forbid creating the shift.
Question: Can all employees be selected at once? Answer: Yes, with the Select all button on the fourth step.
Question: Is the schedule created right after “Add” is pressed? Answer: Yes, this is the final action of the wizard.