¶ Employee registration in Shifton app
Registering an employee in the Shifton app
This article will tell you how company employees can register in the Shifton app.
Employees can register in the Shifton app after receiving an invitation to a phone number or email address.
You can read more about adding and inviting employees to a company in the articles “Adding employees to a company through the “Employees” page and “Adding employees to a company via file import”.
After sending an invitation, an unregistered employee will receive a message with a registration link to their phone or email address.
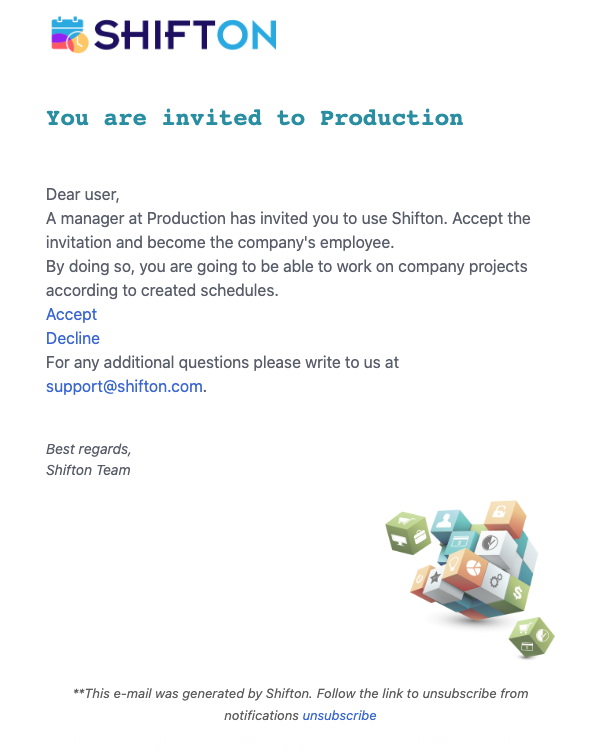
By clicking on the link, the employee will be on the registration page.
Here you need to do the following:
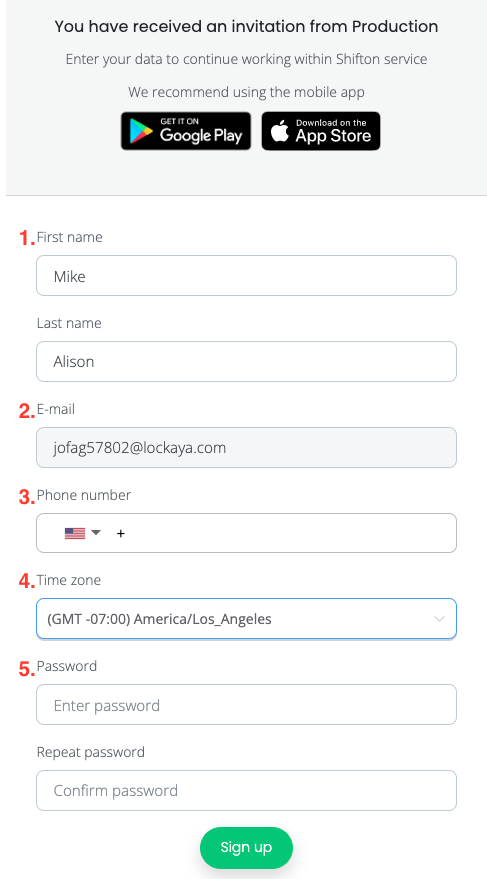
- Enter your first and last name.
- The phone or email field will be disabled depending on where the invitation came from. The email or phone number to which the invitation was received will be automatically entered in the blocked field.
- Select time zone.
- Enter and repeat your password (It must be at least 6 characters, contain at least 1 number, 1 uppercase and lowercase letter).
Click on the “Register” button.
After that, you will be added to the list of company employees.
¶ Adding employees to a company through file import
Adding employees to the company through file import
To add employees via file import, do the following:
Click on the “People” icon
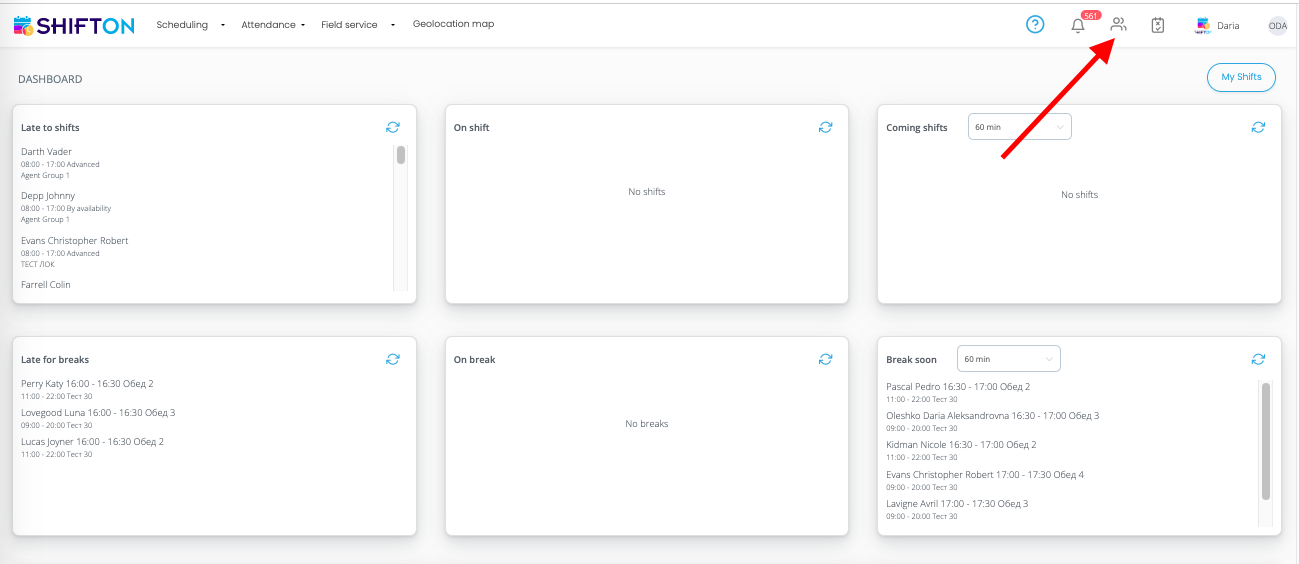
On the page that opens, click on the “Import” button.
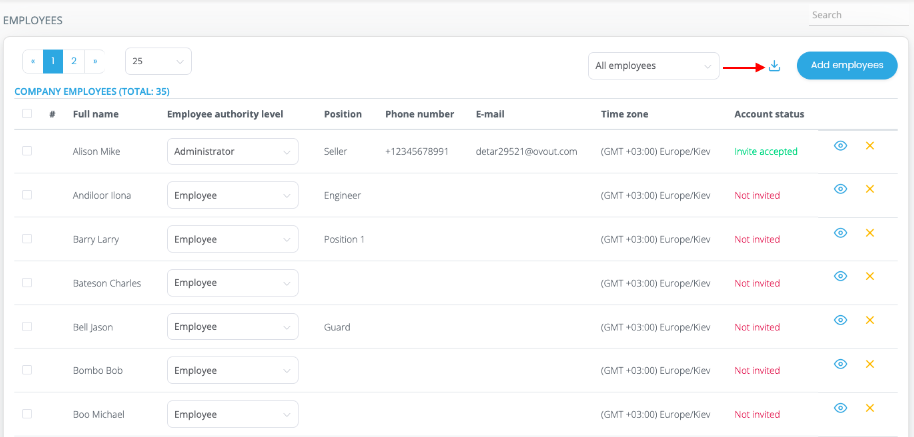
In the window that appears, an example of filling in the data for importing employees as a list is displayed.
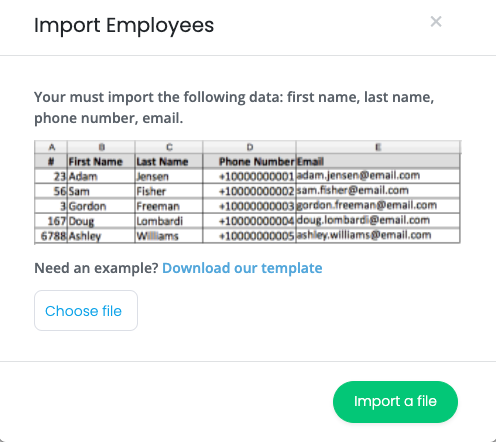
You can also download a template file by clicking on the appropriate button “Download Template” and fill it out according to the example.
To import the list, click on the “Choose file” button and upload a file with employee data. Supported formats are .CSV and .XLSX.
Then click on the “Import list” button.
Then it is necessary to bring the information from the fields in the loaded document into line with the system fields of the Shifton service.
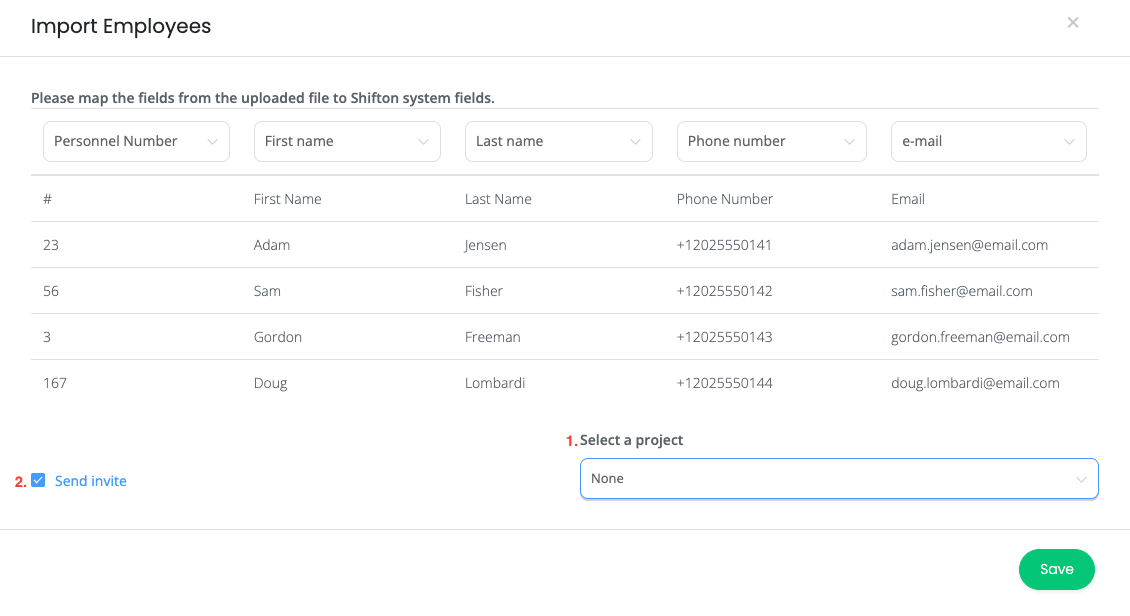
1. If you wish, you can immediately add an employee to one of the company's projects.
2. To send invitations, you must tick the appropriate box. If you do not invite employees, they will not receive notifications about created work schedules, will not see their shifts on the schedule and will not be able to use other Shifton functionality, but you will be able to use them in schedules as employees without registration.
After clicking on the “Save” button, specialist profiles will be created in the list of employees. They will be able to use the created accounts after registering on the service.
To see the status of invitations:
Click on the “People” icon

To the right of the list of company employees, the invitation statuses are displayed.
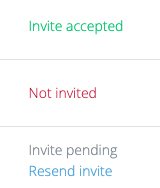
Invitations to the company can also be sent after adding an employee to the company by clicking on the “Invite now” button.
If an employee was added without email/phone, hovering over the text “Not Invited” will display the following message:

To send an invitation, click on the “eyes” icon.

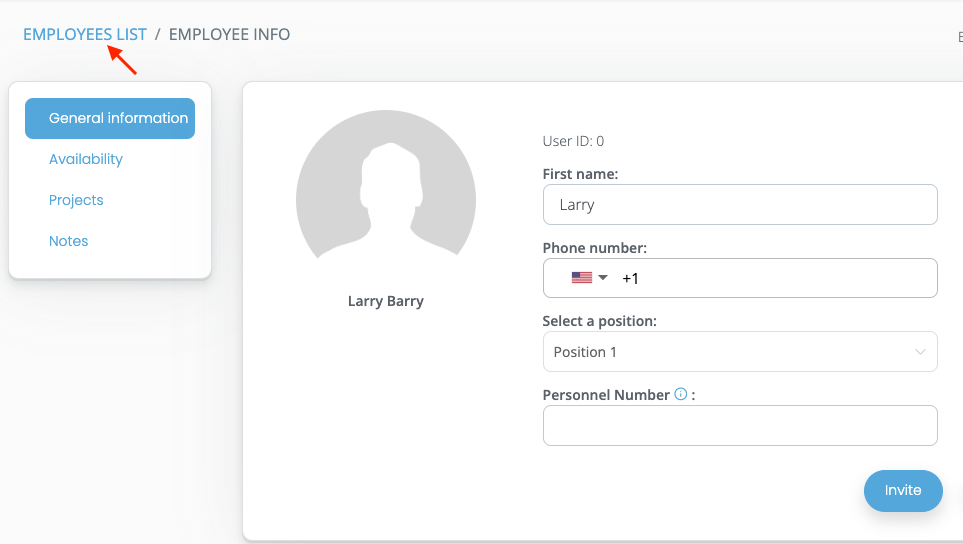
On the page that appears, you need to::
- Fill in the field “Phone number”
- Fill in the “E-mail” field
- Click on the “Invite” button
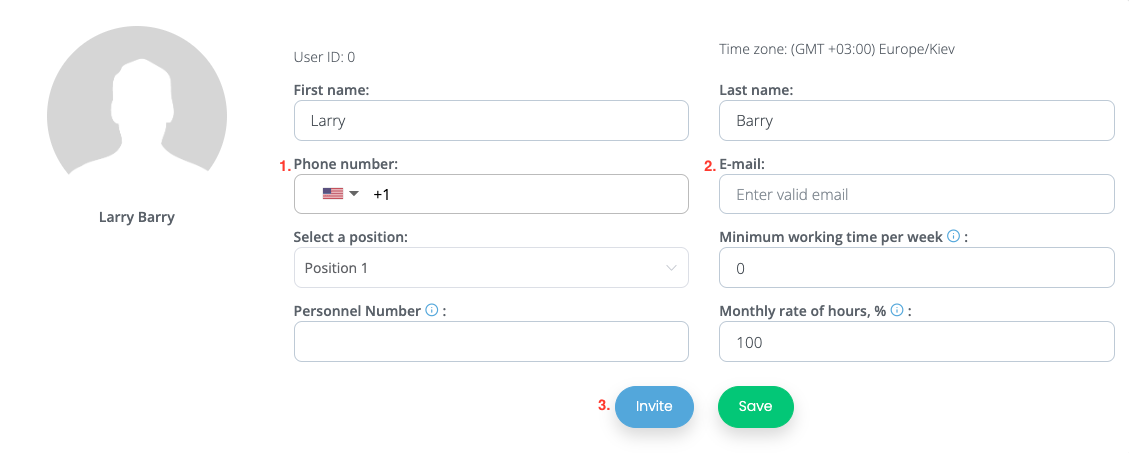
Then click on the “Employees List” button to return to the page with the list of company employees.
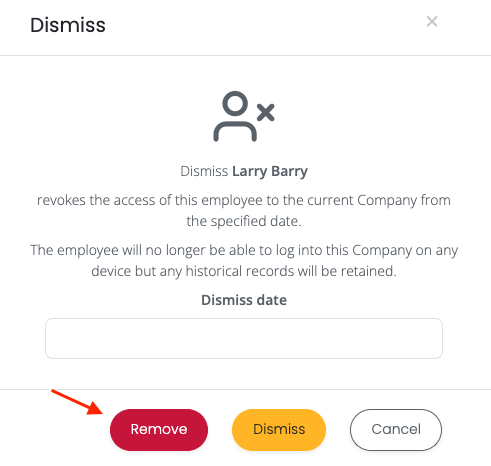
To delete an employee (for example, if he was added by mistake or entered the wrong phone/email address), click on the “cross” icon:

In the window that appears, click “Delete” to confirm.
¶ Adding employees to the company through the “Employees” page
Adding employees to the company through the “Employees” page.
To add employees:
- Click on the “People” icon

On the page that appears, click on the “Add employee” button.

In the pop-up window, fill in the following fields:
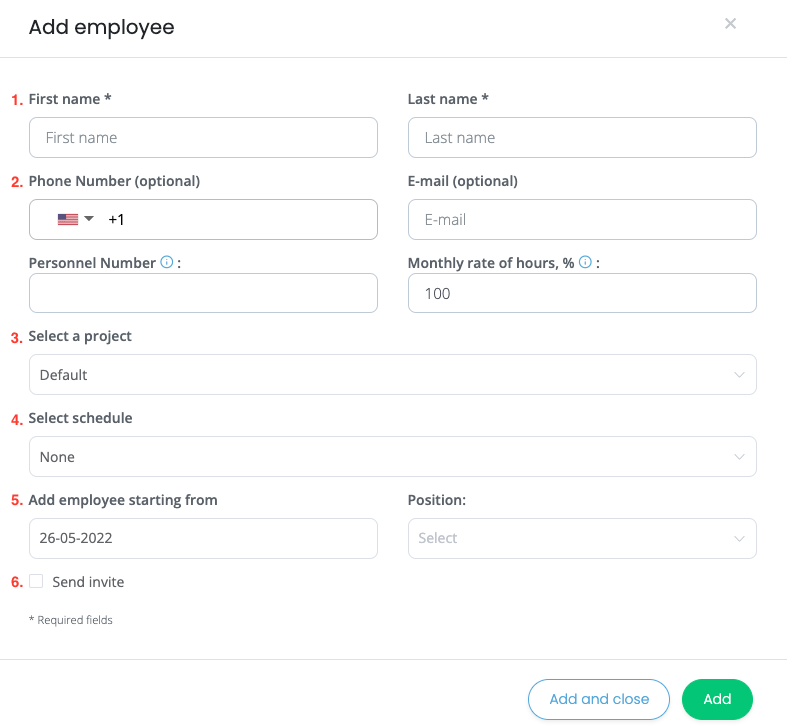
1. First name, last name of employee.
2. Enter mobile phone number.
3. Specify the email address for the invitation to the company.
*If the employee is already registered in the system, the invitation will be sent to his email address. An unregistered employee will receive a link with an invitation to the specified phone number or e-mail. You can send no more than 3 SMSes per day to one phone number.
*Additionally, you can specify the personnel number, the monthly rate of hours in “%”, position.
4. Additionally, you can select the project to which you want to add an employee, or specify “none”
5. Also, it is possible to select the schedule to which you want to add an employee, or specify “none”
6. Select the date from which you want to add the employee to the schedule.
7. Click on the “Send Invitation” button to send an invitation to the employee.
After clicking the “Add” button, profiles of employees will be created who will have access to personal accounts after completing registration on the service.
¶ How to fire an employee
How to fire an employee.
The owner of the company or the administrator can dismiss an employee.
After firing, the access of this employee to the current company from the selected date is cancelled. From now on, the employee will not be able to log into the account on any device.
To get started, click on the “People” icon

Click on the “cross” button.

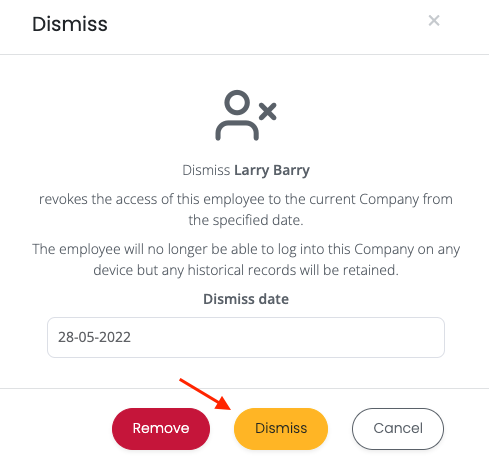
Specify the date from which you want to dismiss the employee.
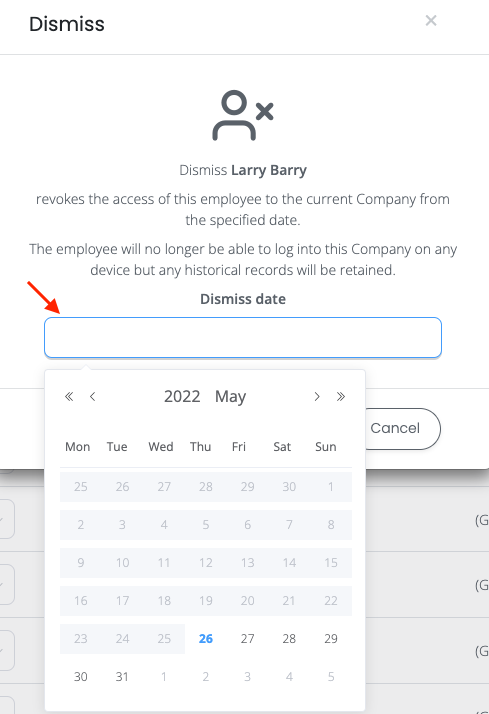
Click the “Dismiss” button.
¶ How to remove an employee
¶ From the company
The owner of the company or administrator can remove employees from the company.
To remove an employee from the company, click on the “People” icon.

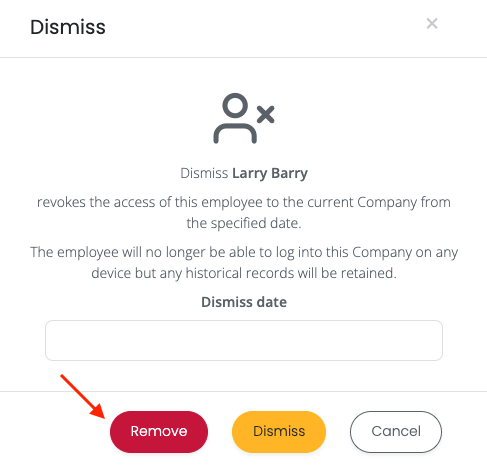
Near the employee, click on the “Cross” button.

Click on the "Remove" button.
¶ From the project
The owner of the company or administrator can remove employees from the project.
First, click on the Scheduling button.
Click on the "Projects" tab.

Near the project from which you want to remove an employee, click on the “Pencil” icon.

Next to the employee you want to remove from the project, click on the "X" sign.
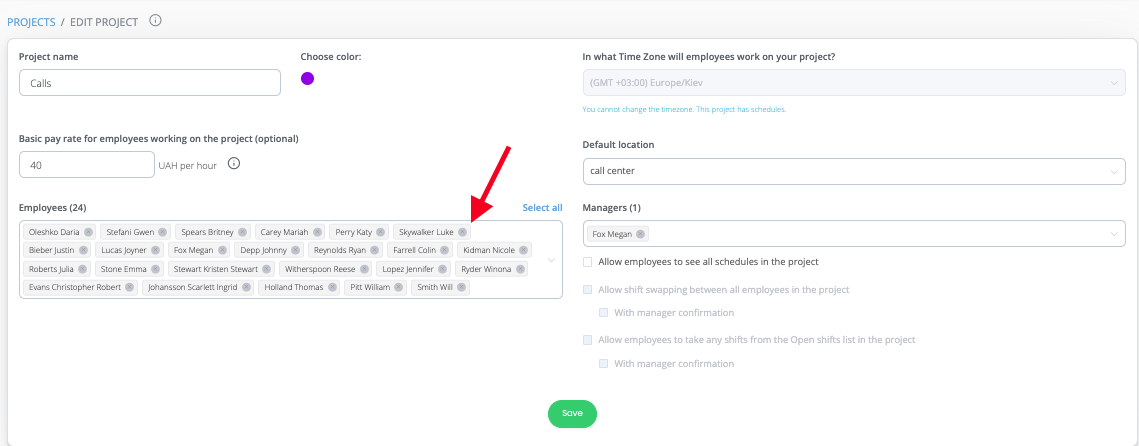
To save your changes, click on the “Save” button.
¶ From the schedule
The owner of the company, administrator, manager can delete employees from the schedule in the schedules within their project.
To remove an employee from the schedule, click on the Scheduling.
Click on Schedules tab
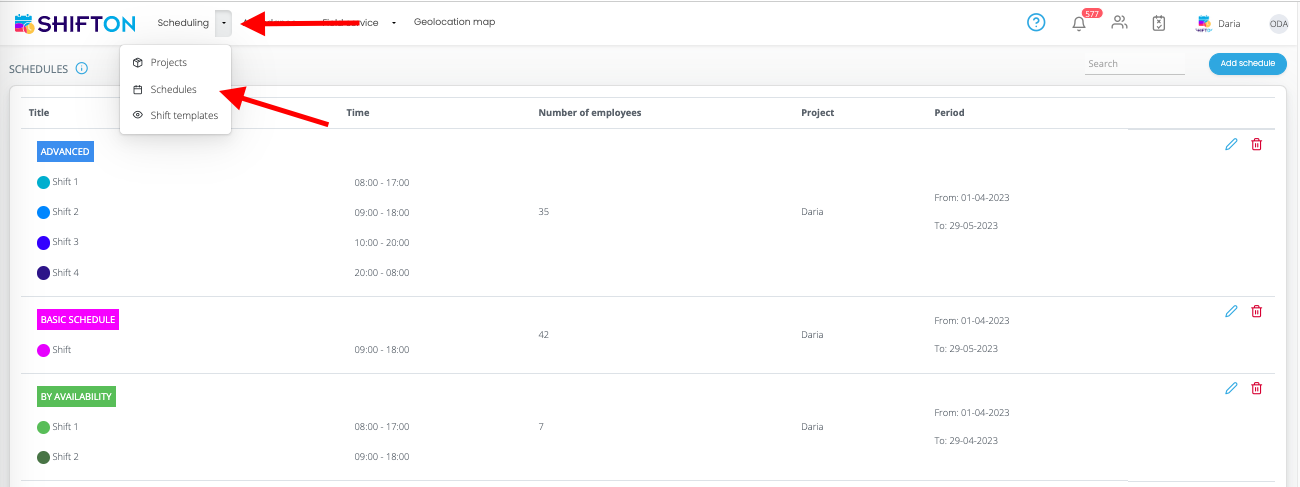
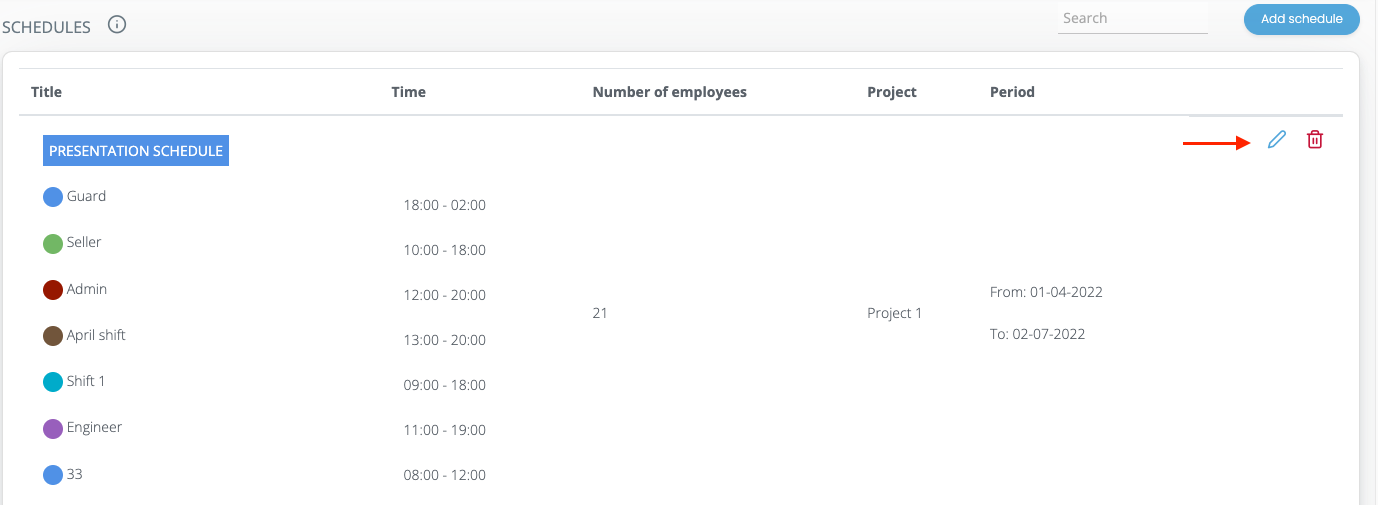
Click the “Pencil” button next to the schedule from which you want to remove an employee.
In the left menu, click on the "Remove Employees" ta
In the window that appears, you need to:
- Select the employee you want to remove from the schedule.
- Select the date starting from which you want to remove the employee from the schedule.
- Choose what actions you need to do with employee shifts: Move to the list of free shifts or remove from the schedule.
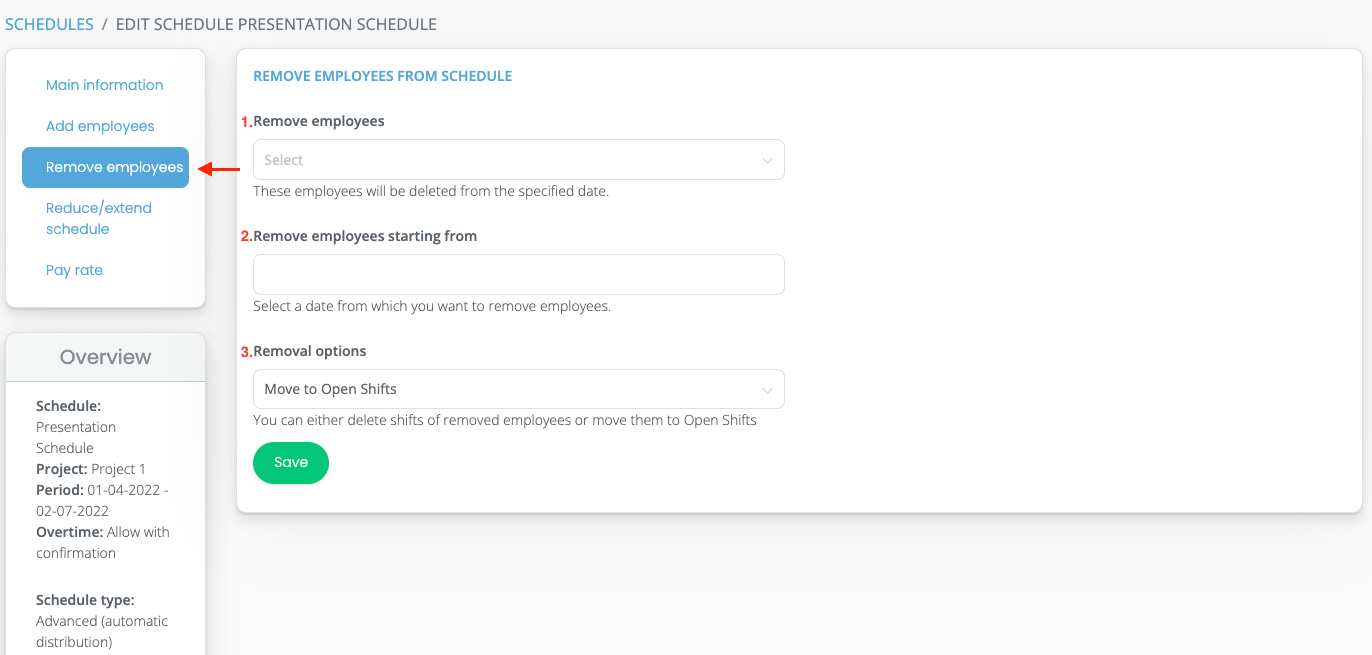
To save the information, click on the "Save" button.