Task Statuses: Standard Workflow & Advanced Customization
Task statuses help you track every step of a job — from the moment it appears in the system to its successful completion.
Shifton includes a default status workflow used by most companies, while also allowing you to configure a more detailed status process if your operations require it.
✅ Default Status Workflow
By default, every task follows three key stages:
| Status | Visibility | Purpose |
|---|---|---|
| TO DO | hidden from technicians | Internal system start point that defines the first selectable statuses |
| Check In | visible | Technician has started the job |
| Check Out | visible | Technician has completed the job |
Standard Workflow
This workflow is ideal for a simple process:
start task → complete task → move to next one.
✨ Advanced Status Workflow (Optional)
If your processes include:
job acceptance,
travel to client,
approvals and confirmations,
temporary pauses,
return visits or warranty work,
you may want to expand the workflow with additional statuses.
Example of an extended process
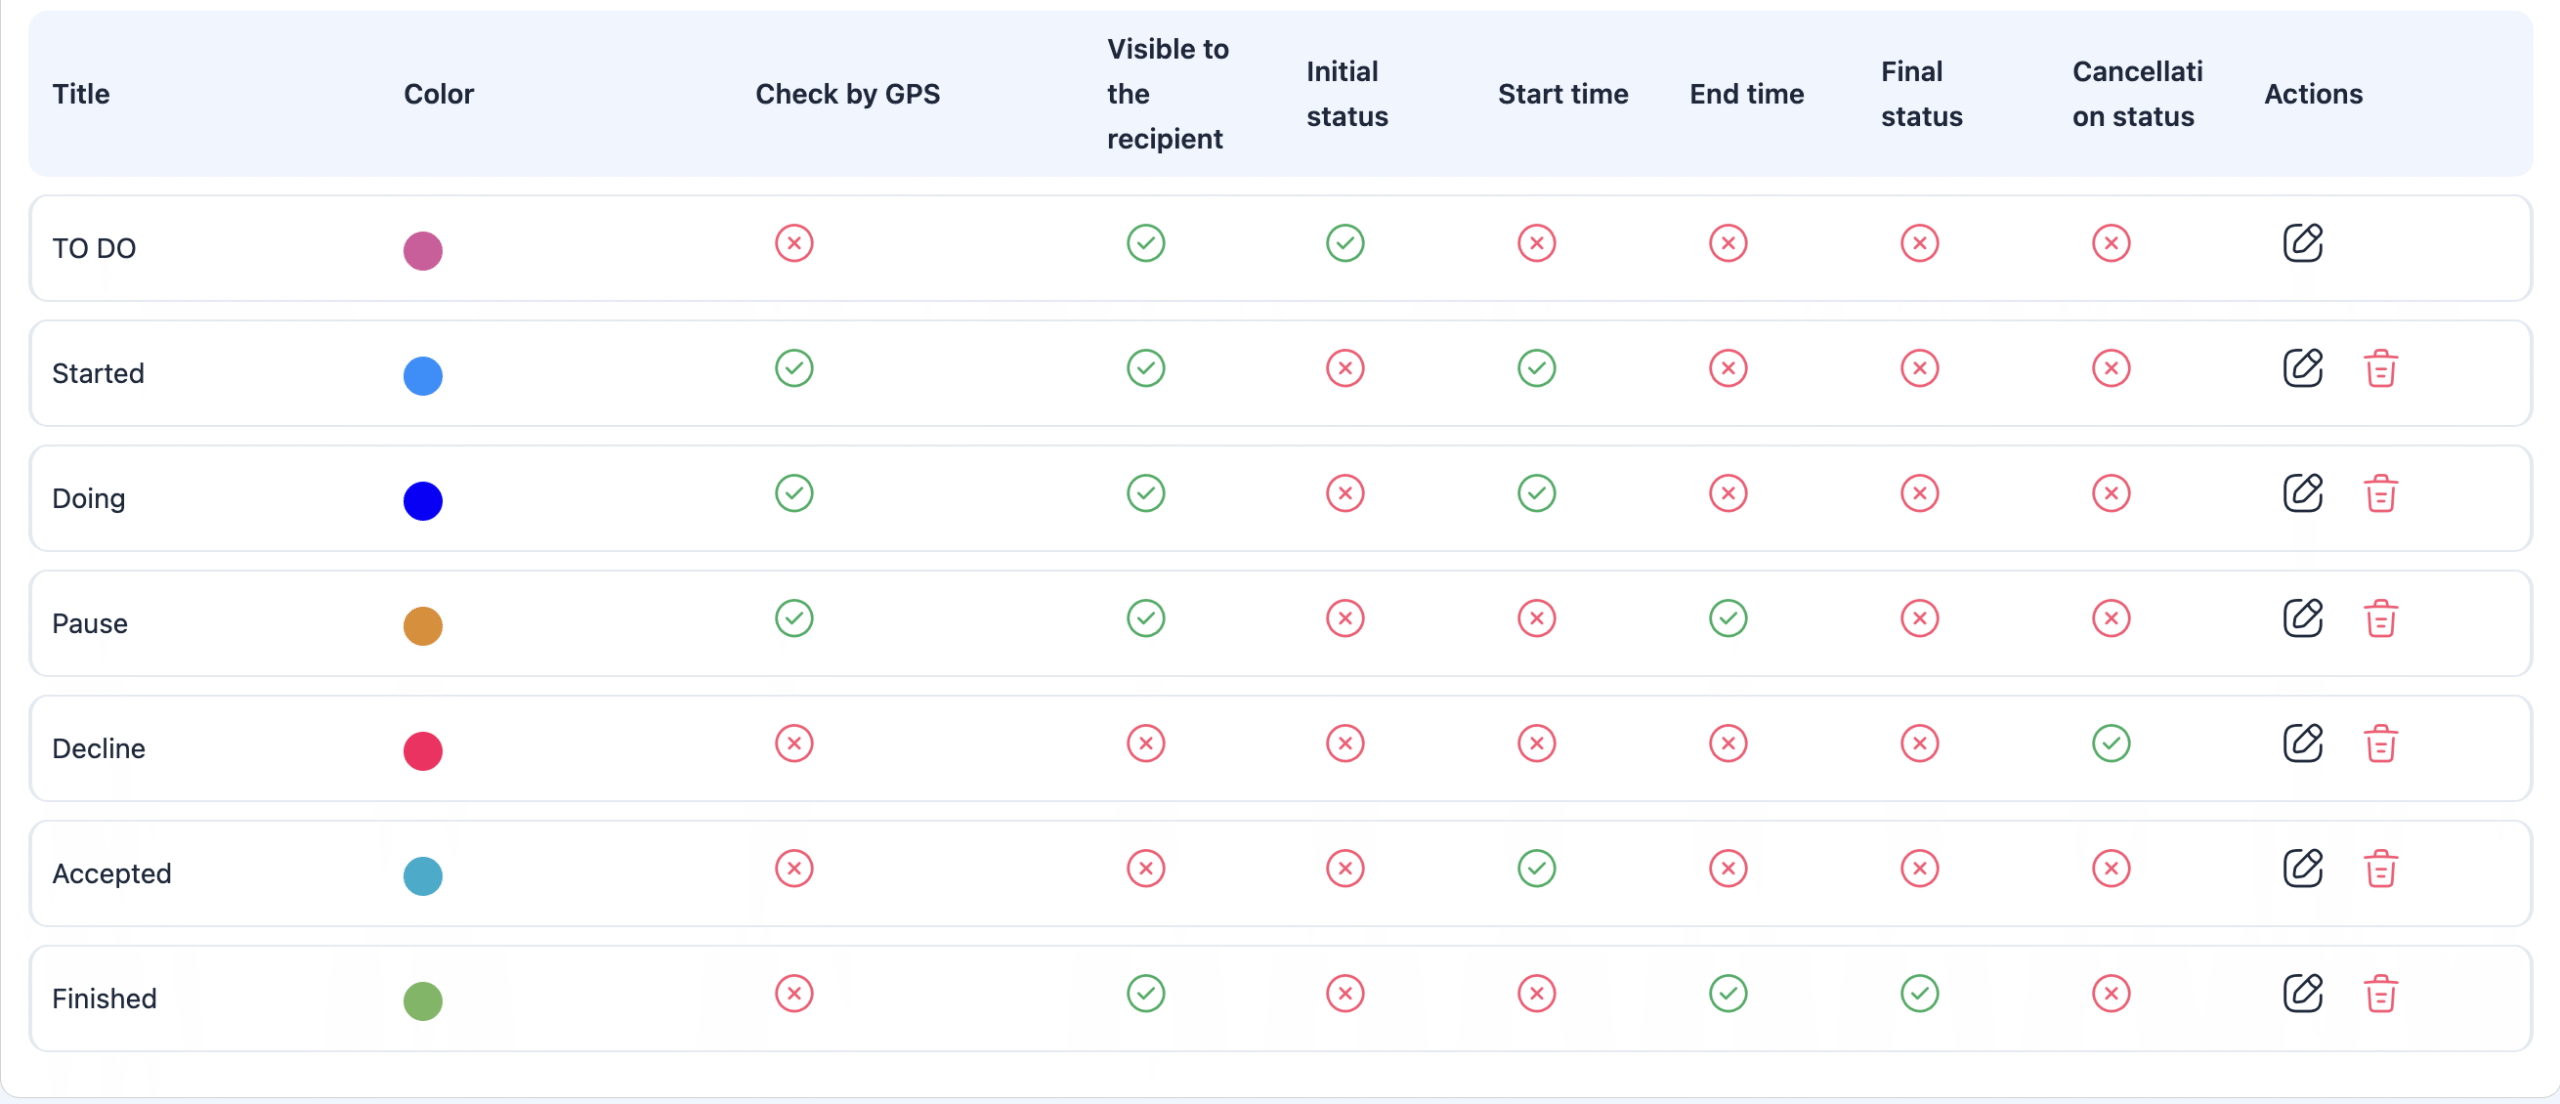
🧩 TO DO — Internal Hidden Status
Even in advanced workflows, TO DO remains hidden and is used only to define the first visible statuses.
Available choices from TO DO:
Accept — technician takes the job into work
Decline — technician rejects the job
❌ Decline is a final status — no further actions are available.
🔄 Main Execution Flow
Once the job is Accepted:
Doing = technician is actively working
Next step is a single choice from available transitions:
⏸ Pause — Temporary Suspension
Used when the technician must stop the task for a period of time:
waiting for parts,
client unavailable,
scheduling a return visit.
Allowed transitions from Pause:
Started — preparing to resume execution
Finish — task can be closed at this stage
🏁 Finish / Check Out — Final Status
The job has been fully completed by the technician.
Optionally, the task can be reopened by an administrator if further work is needed (e.g. warranty adjustments).
Creating special statuses for return visits is recommended:
Warranty work
Second visit
Follow-up required
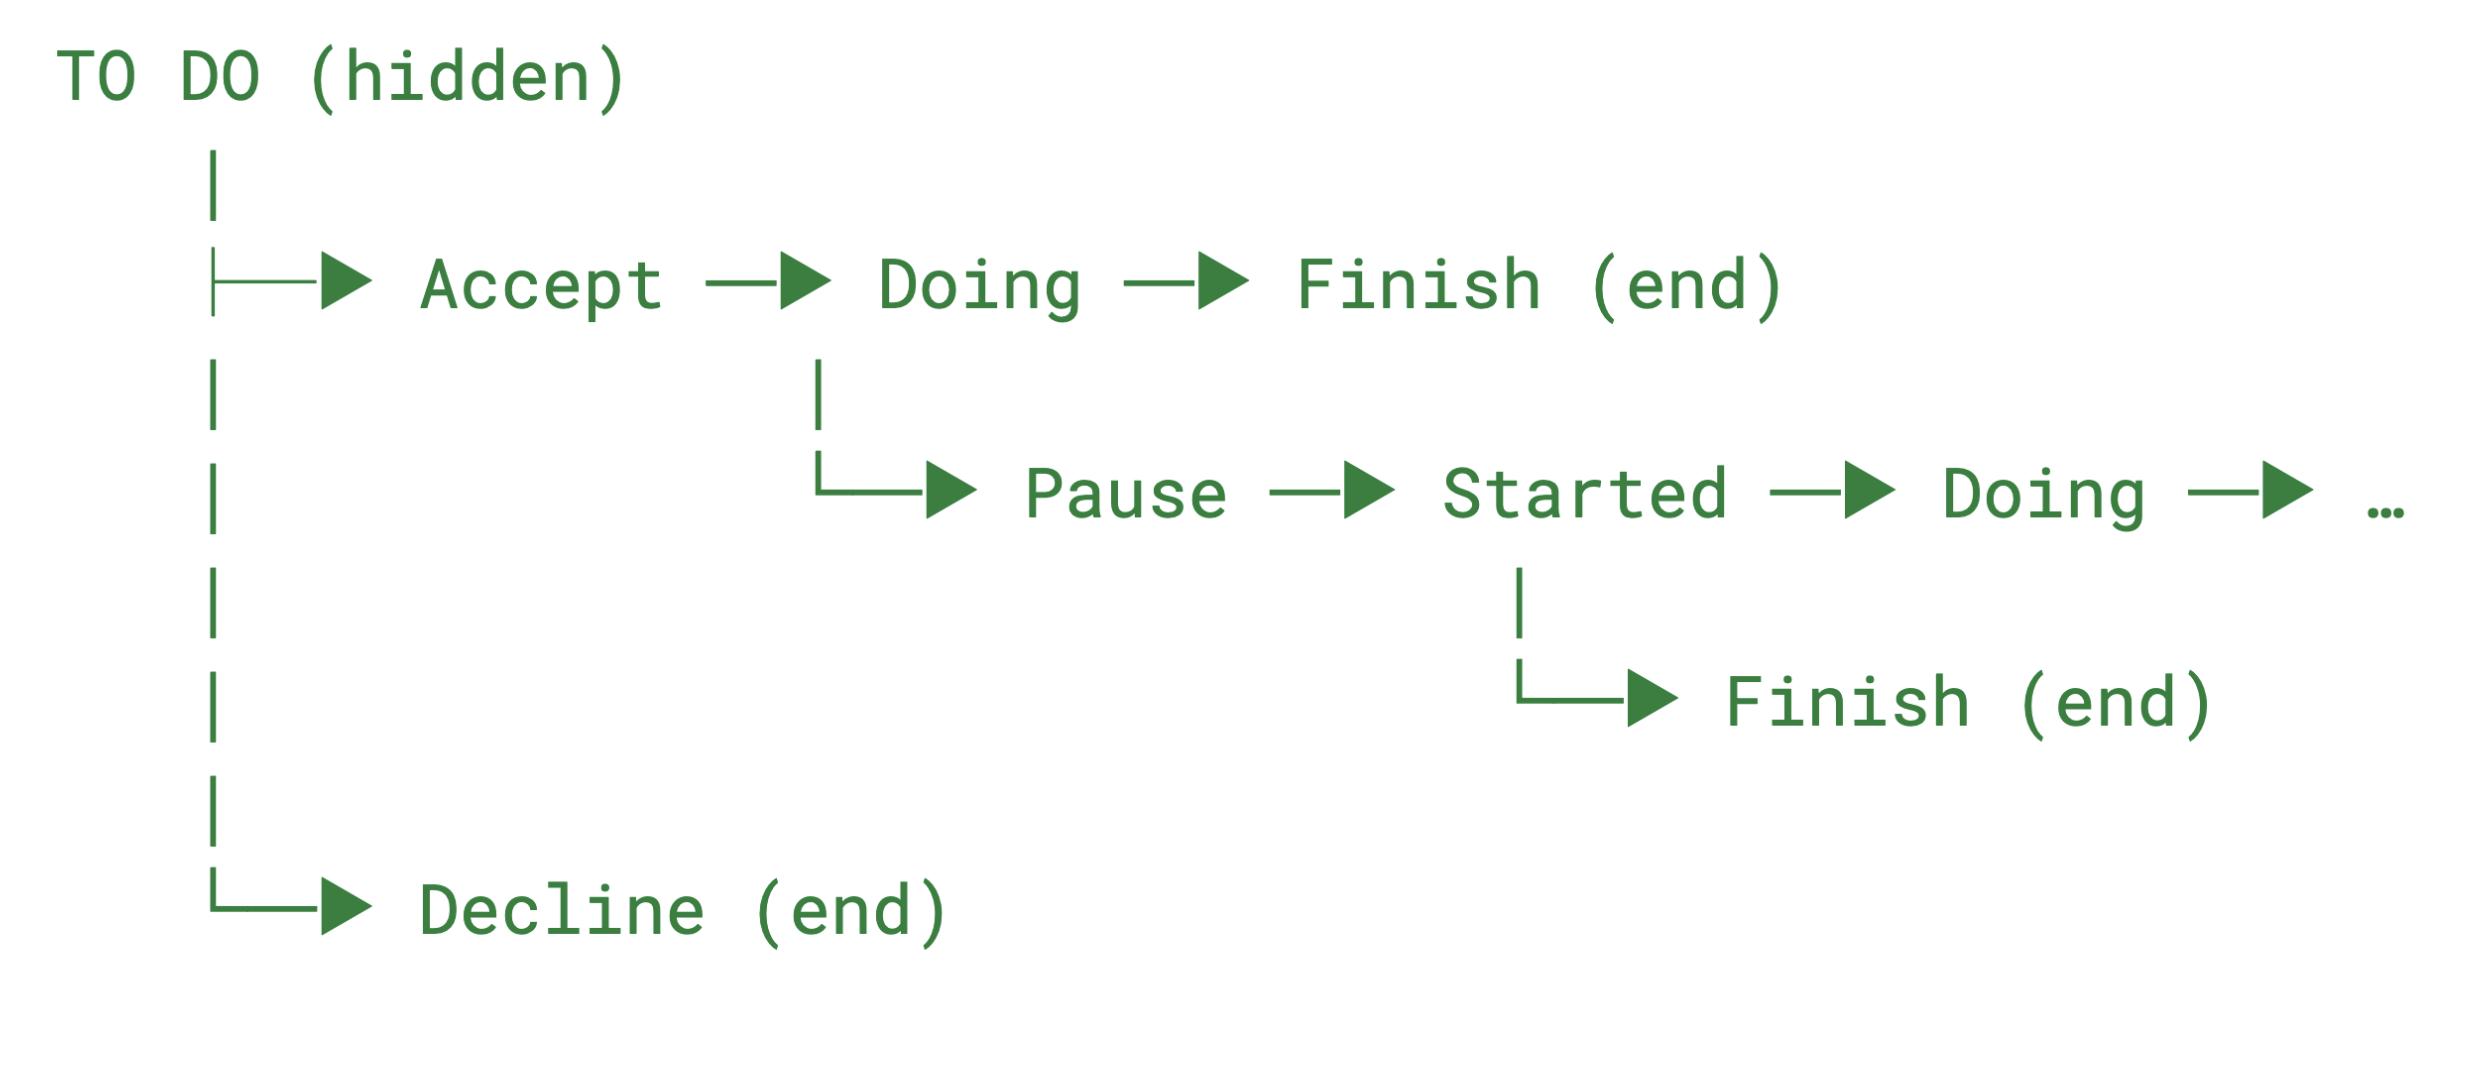
📊 Extended Workflow Example Diagram

🎯 Choosing the Right Workflow
| Use the Default Workflow When | Use the Advanced Workflow When |
|---|---|
| Tasks are simple and linear | Tasks have multiple execution steps |
| Office-based work | Field service with travel |
| Every task can be completed in one visit | Delays, returns, and approvals happen |
| No need for task confirmation | Confirmers or dispatchers are involved |
🛠 How to Configure Advanced Statuses
1️⃣ Go to Task Settings → Statuses
2️⃣ Add custom statuses
3️⃣ Define allowed transitions for each status
4️⃣ Make sure each status leads to a logical next step (except final statuses)
✅ Benefits of a Well-Configured Workflow
Technicians always know what action to take next
Dispatchers monitor progress in real time
Managers gain insight into task performance and field operations
Workflows become structured, automated, and predictable
Frequently Asked Questions (FAQ)
TO DO (internal start point),
Check In (when the technician starts the job),
Check Out (when the technician completes the job).
TO DO → Accept → Doing → (Pause) → Finish, reflecting acceptance, execution, temporary stops, and completion.