Learn how the Schedules page is organized and how the two-step schedule creation wizard works. This article covers the layout, tabs, and general workflow before you dive into specific schedule types.
What Is This?
The Schedules page is your central hub for creating and managing employee work schedules. It features two tabs: Schedules and Shift Templates. The Schedules tab lists all existing schedules with key details, while the Shift Templates tab lets you define reusable shift configurations.
Creating a new schedule follows a two-step wizard:
– Step 1: Set basic information — name, color, project, date range, pay rate, and employee permissions.
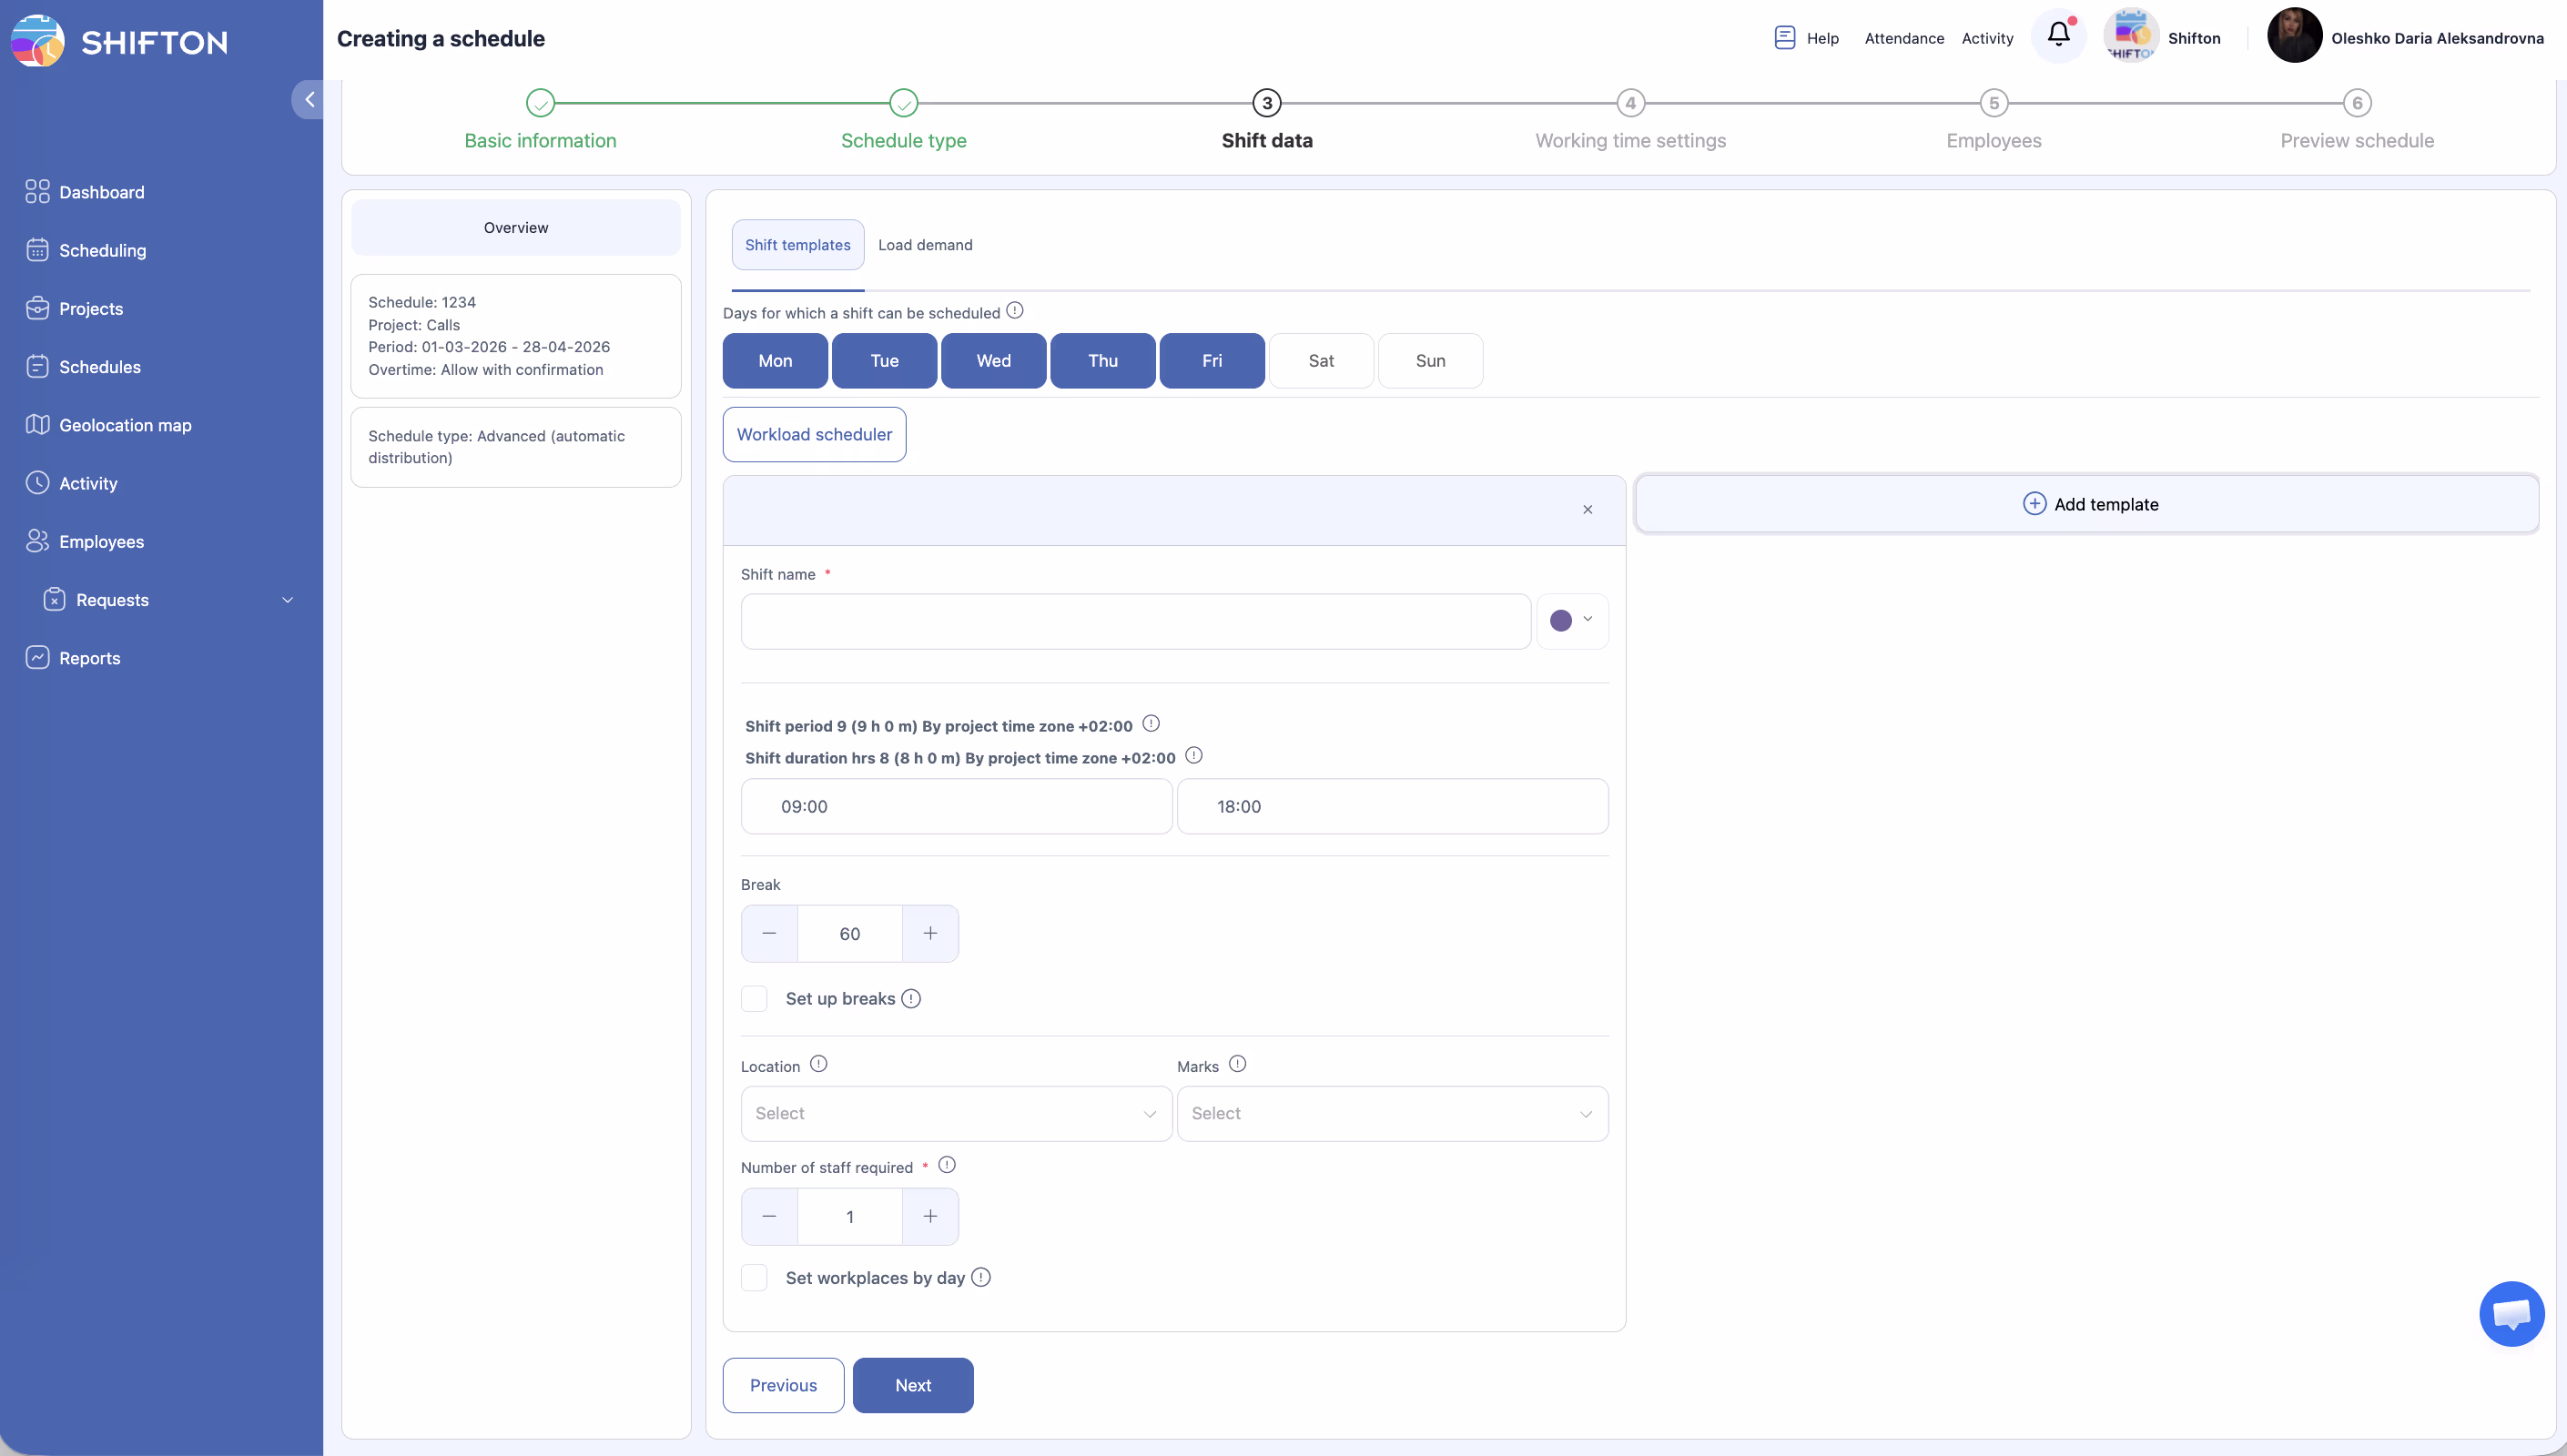
– Step 2: Choose the schedule type and configure its specific settings.
Each schedule can cover a maximum period of 3 months.
Prerequisites
| # | Prerequisite | Details |
|---|---|---|
| 1 | Active Shifton account | You must have a registered company account |
| 2 | Admin, Owner, or Manager role | You need permissions to create schedules |
| 3 | At least one project created | Schedules are always linked to a project |
| 4 | Employees added to the system | You need employees to assign to the schedule |
Step-by-Step Instructions
Navigating to the Schedules Page
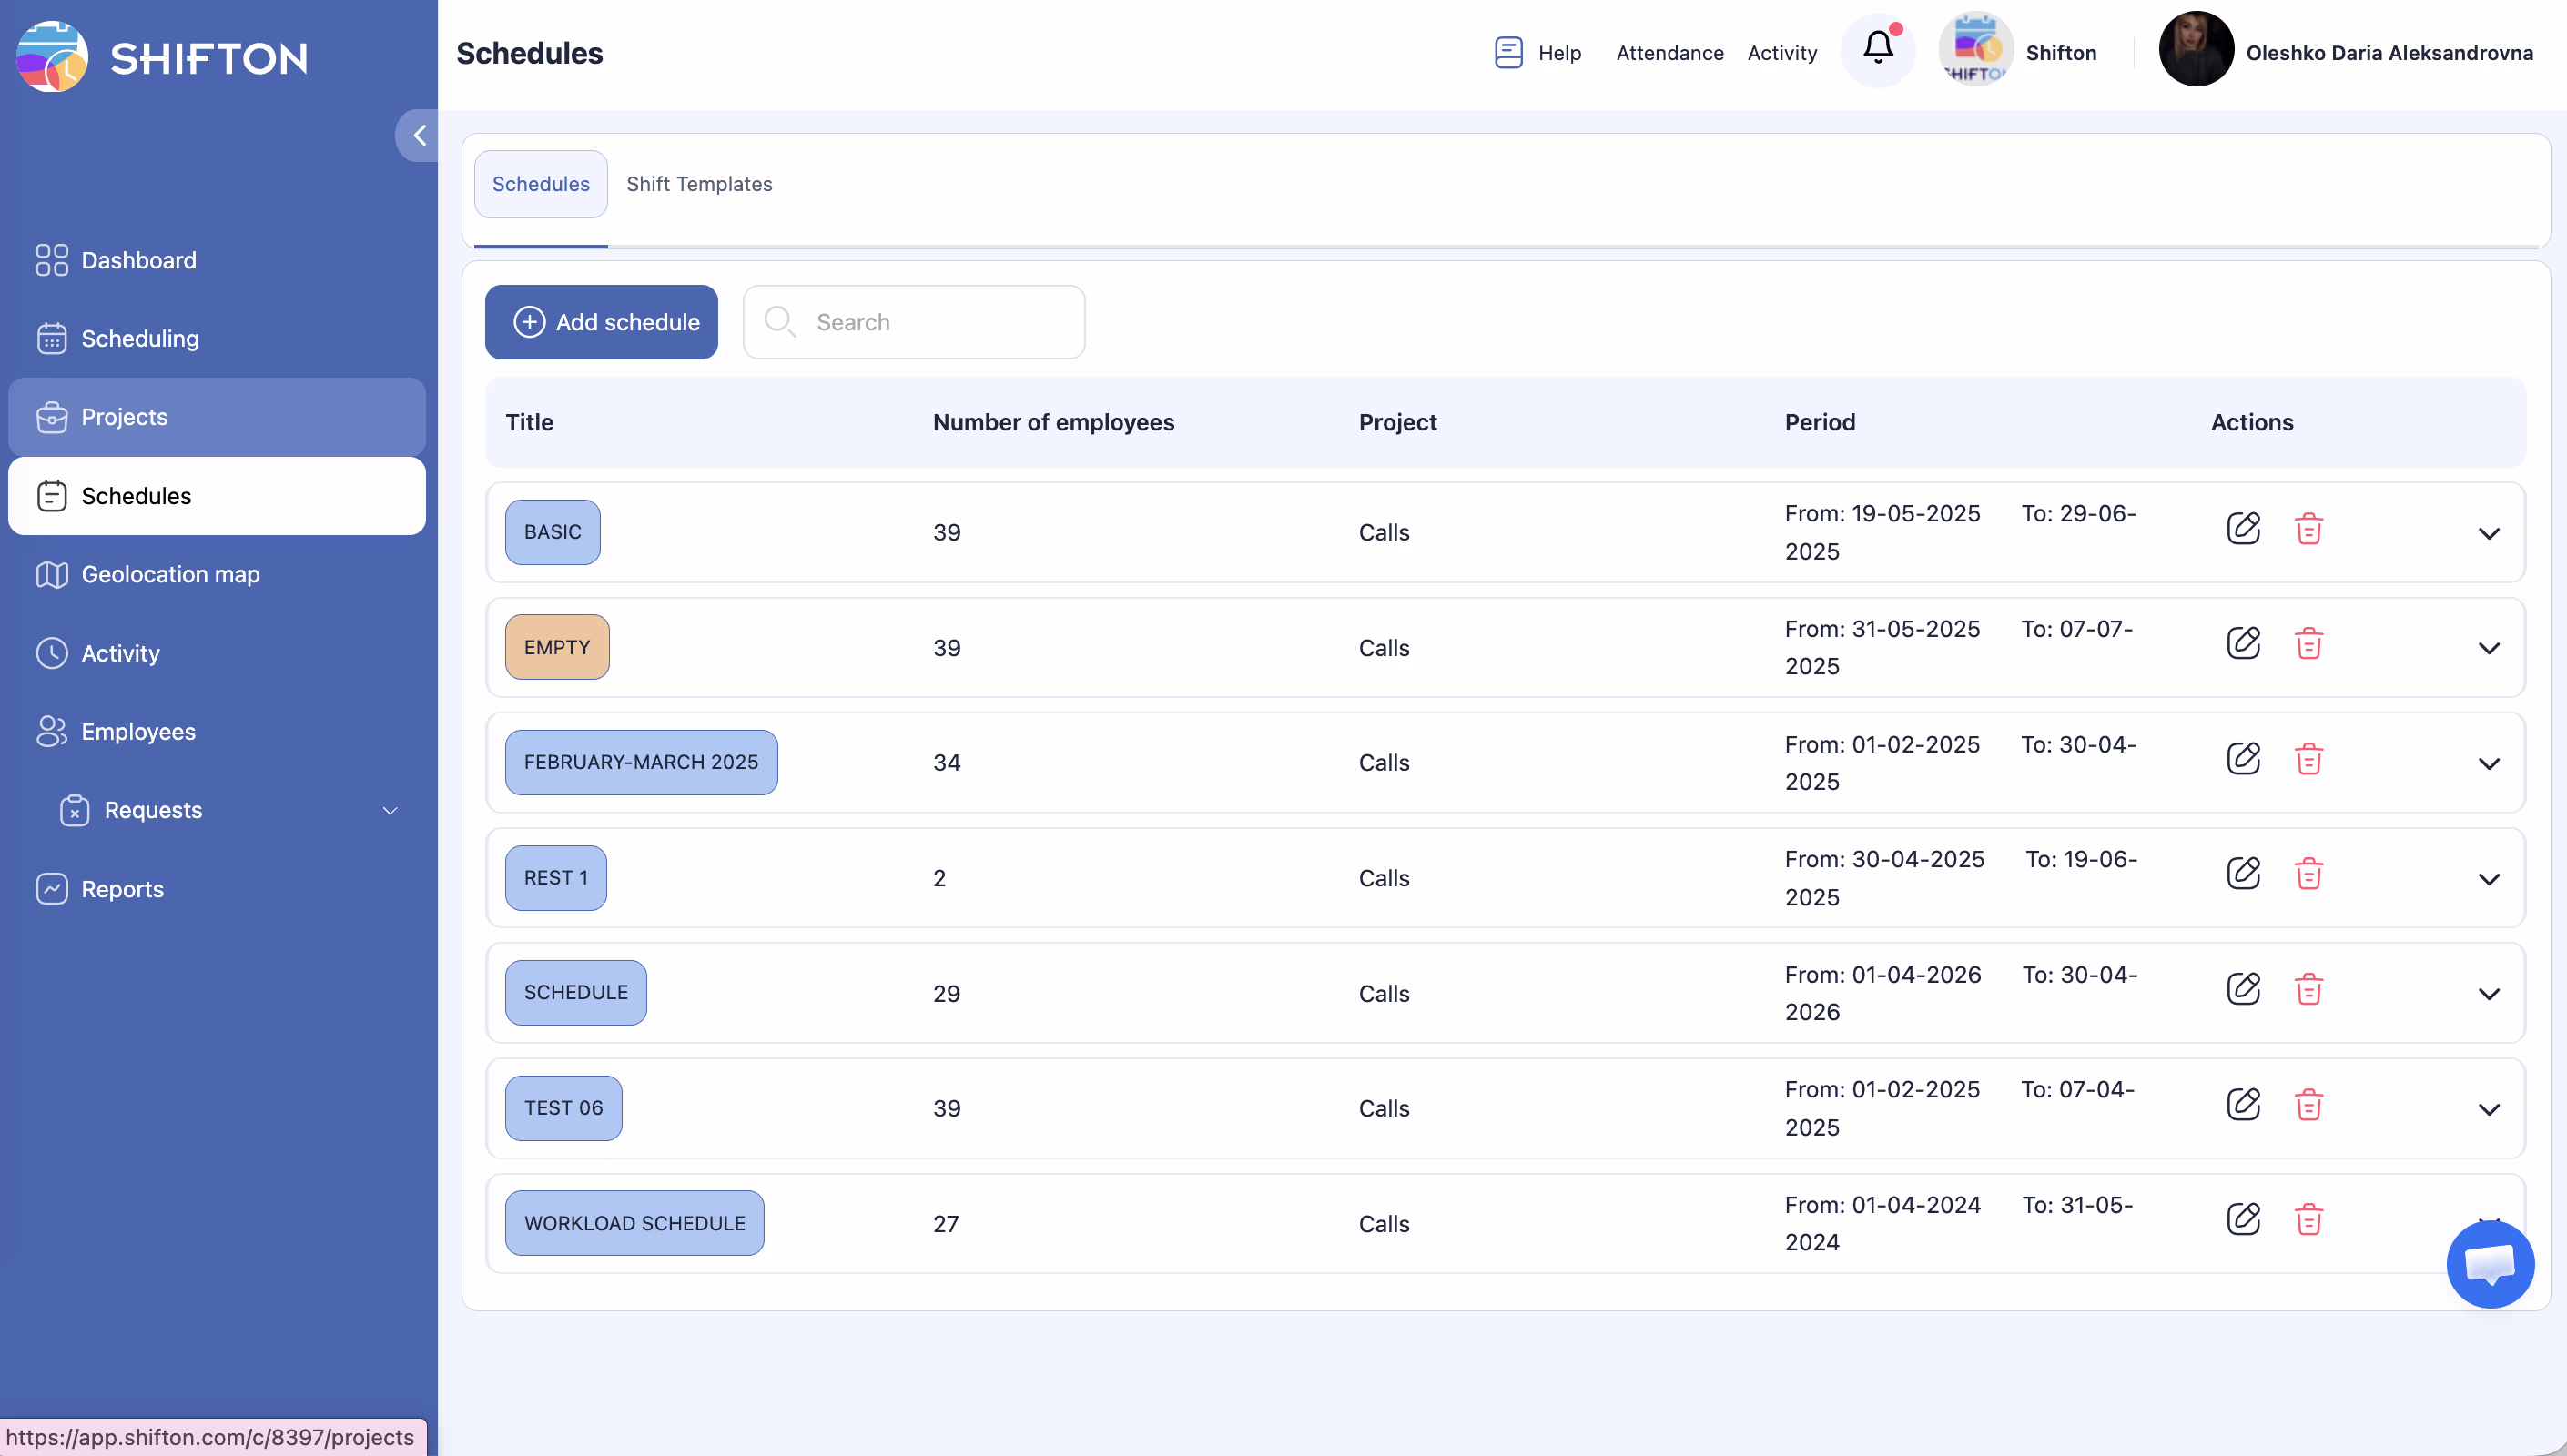
Understanding the Schedules Tab
The Schedules tab displays a table of all your existing schedules:
| Column | Description |
|---|---|
| Name | The title of the schedule |
| Number of employees | How many employees are assigned to this schedule |
| Project | The project this schedule belongs to |
| Period (From/To) | The start and end dates of the schedule |
| Actions | Available operations: Edit, Extend, Delete, and more |
Creating a New Schedule — The Two-Step Wizard
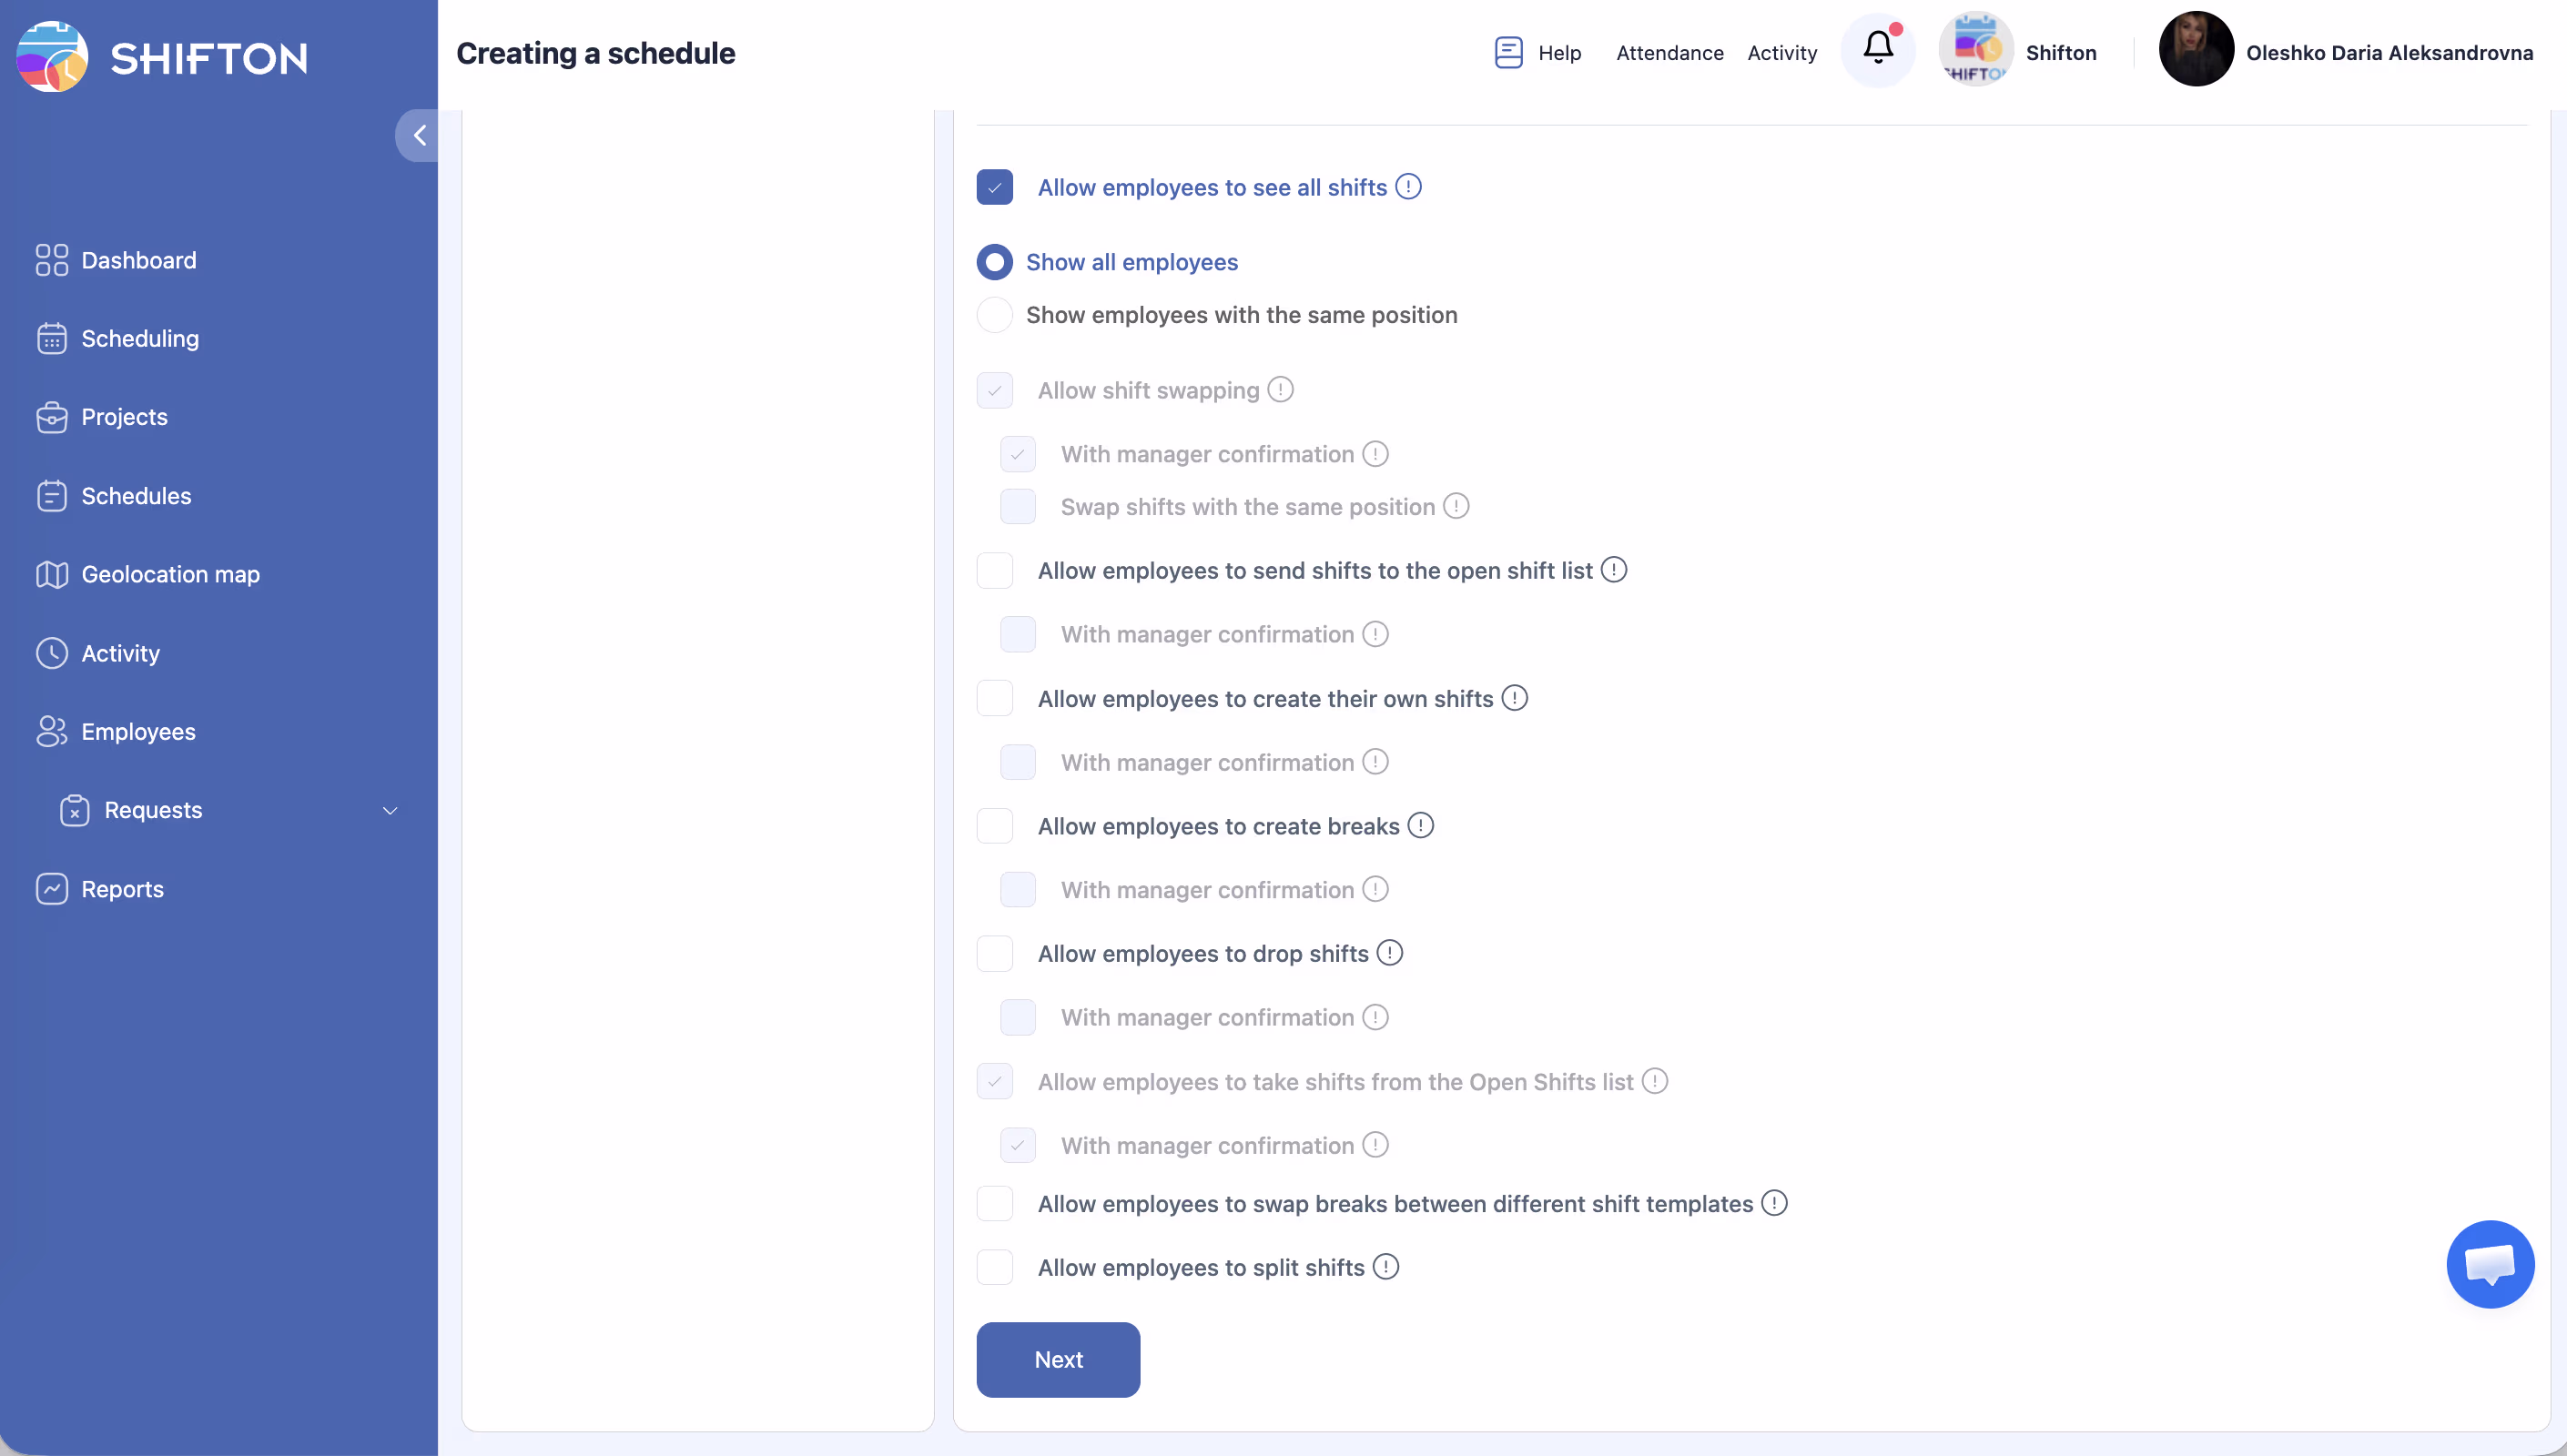
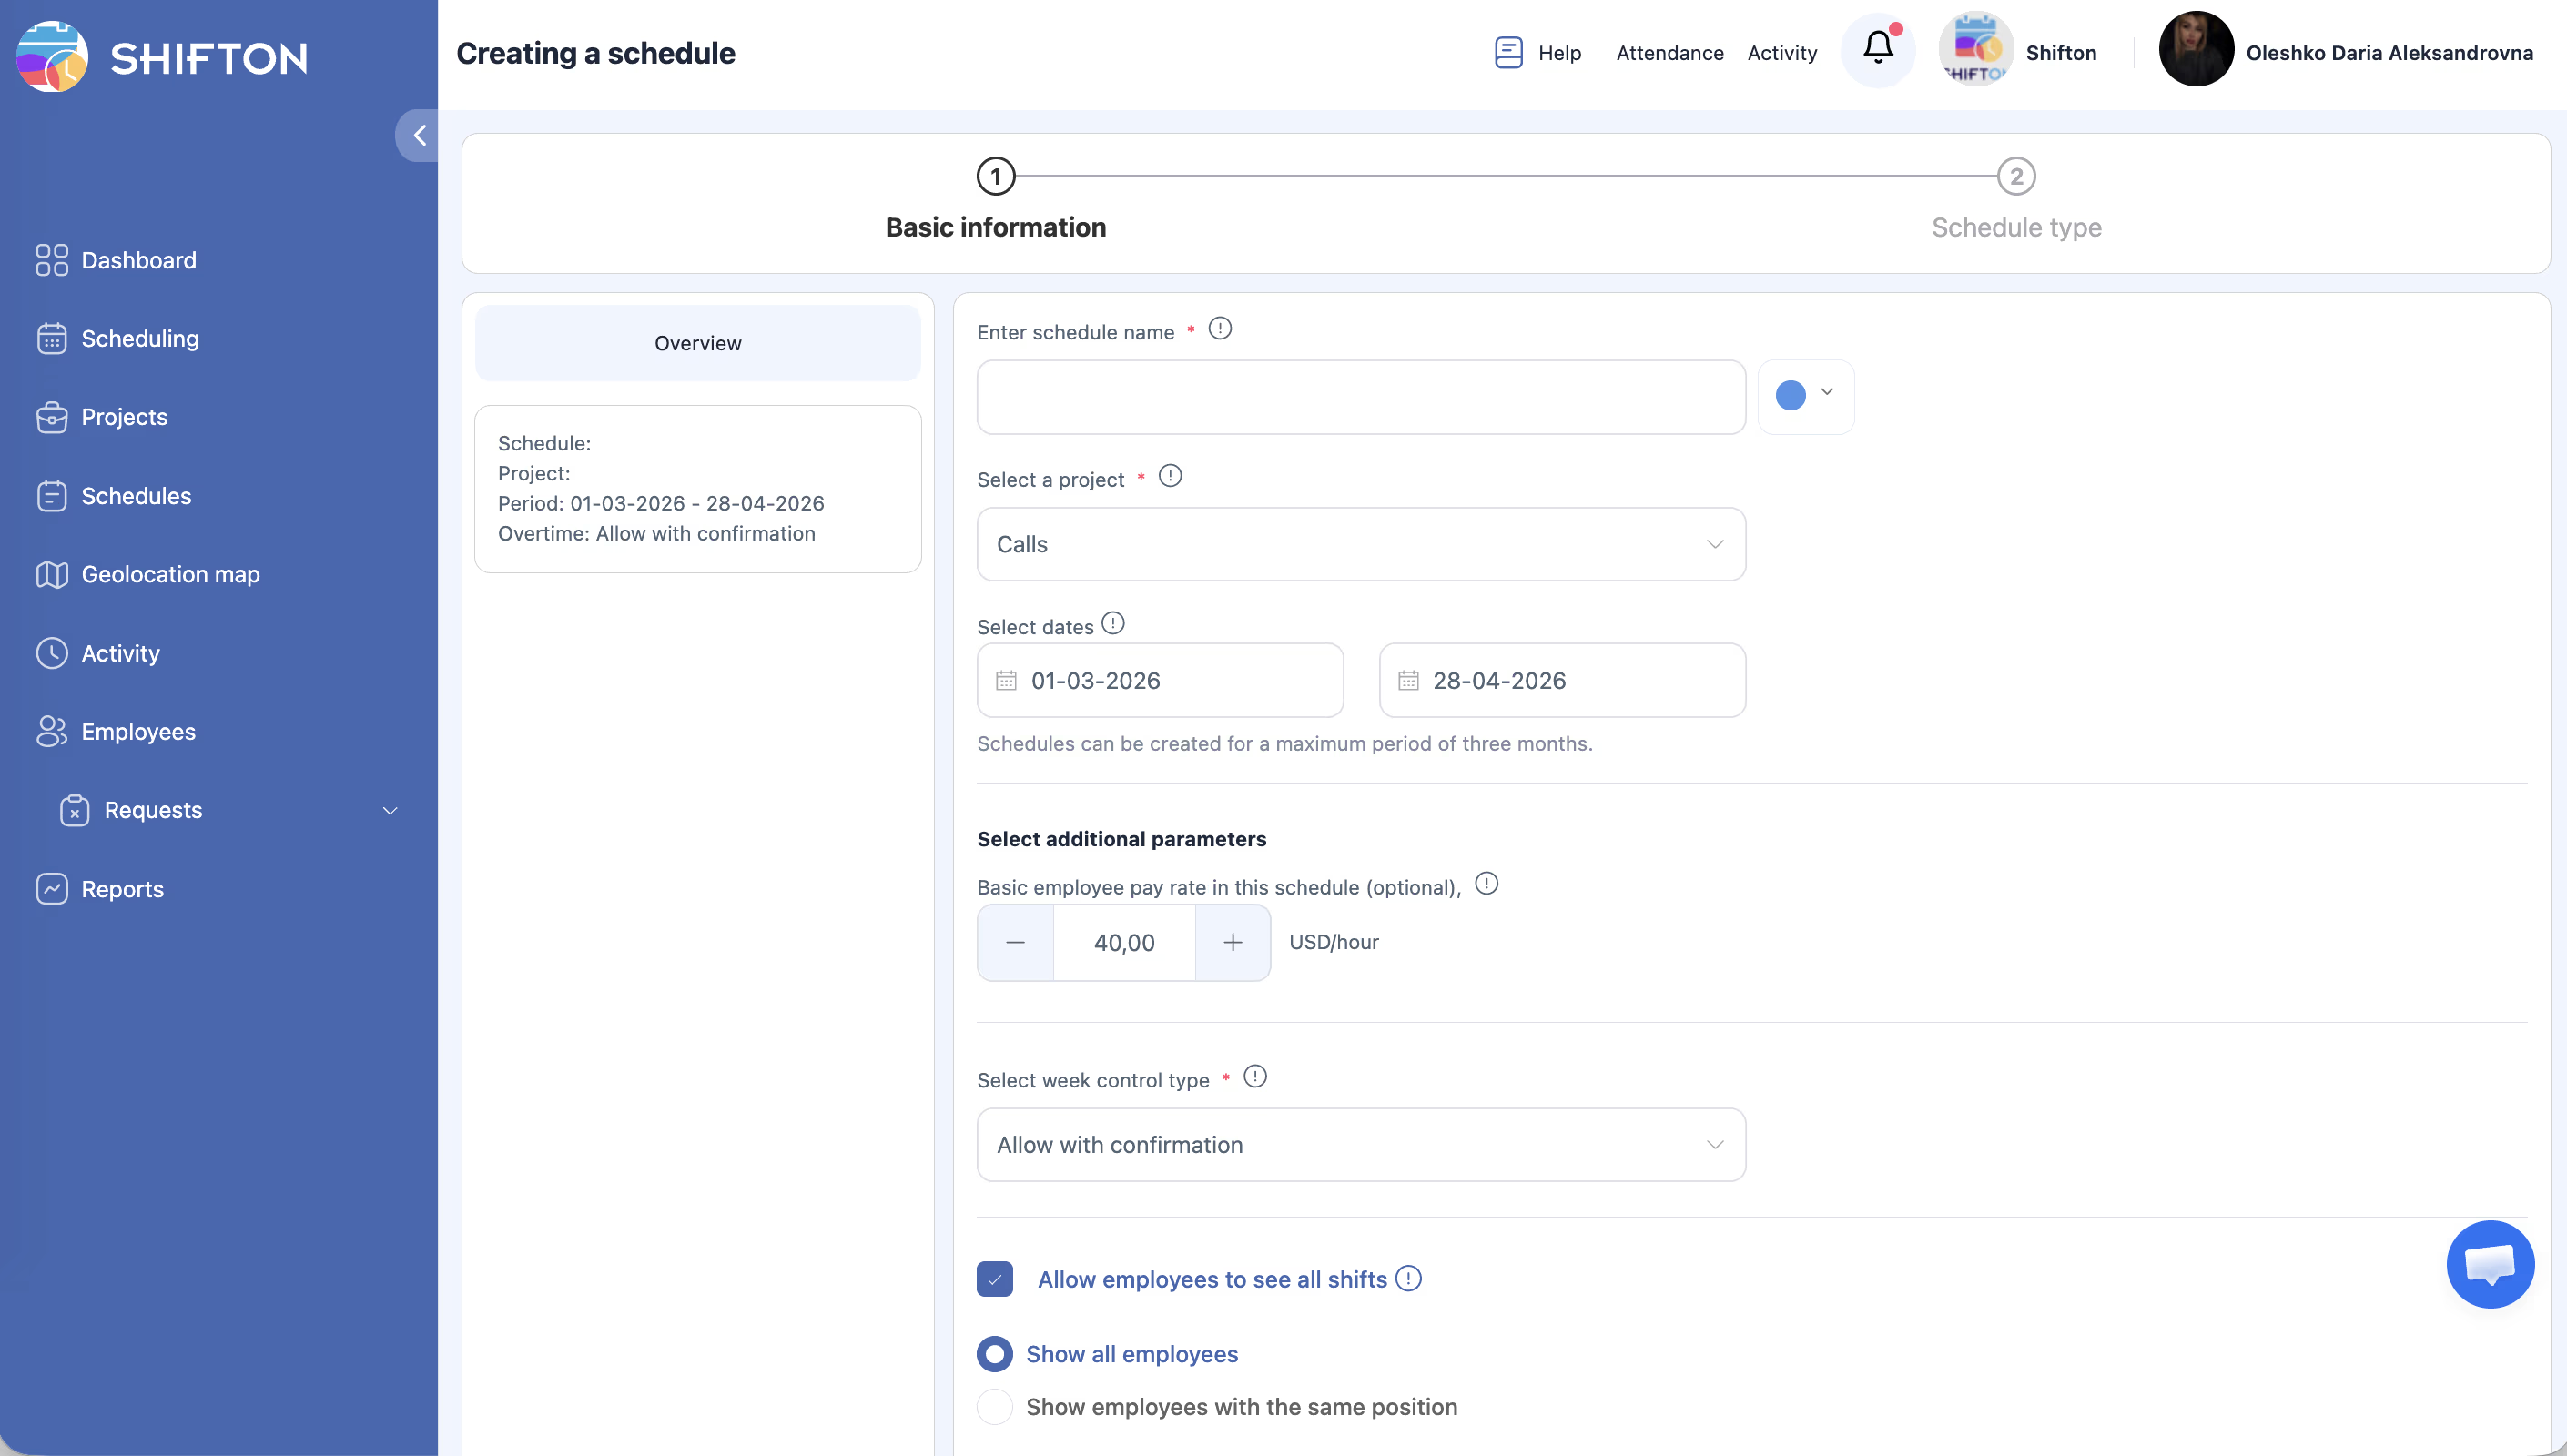
Step 1: Basic Information
Step 2: Choose Schedule Type
Understanding the Shift Templates Tab
Access Permissions
| Role | View Schedules | Create Schedule | Edit Schedule | Delete Schedule |
|---|---|---|---|---|
| Owner | Yes | Yes | Yes | Yes |
| Admin | Yes | Yes | Yes | Yes |
| Manager | Yes (assigned projects) | Yes (assigned projects) | Yes (assigned projects) | Yes (assigned projects) |
| Employee | Yes (own schedule only) | No | No | No |
FAQ
Q: What is the maximum duration for a single schedule?
A: A single schedule can span up to 3 months. For longer periods, create a new schedule that continues where the previous one ended, or extend the existing schedule.
Q: Can I change the schedule type after creation?
A: No. The schedule type is set during creation and cannot be changed afterward. You can delete the schedule and create a new one with a different type if needed.
Q: What happens when a schedule expires?
A: Expired schedules remain visible in the list with a warning icon. They can be extended if needed. See the article on extending and shortening schedules for details.
Q: Can I have multiple schedules for the same project?
A: Yes. You can create as many schedules as needed within a single project, each covering different date ranges or different groups of employees.
Q: Do I need to create shift templates before creating a schedule?
A: No. Shift templates are optional and are used for convenience when manually adding shifts. Automatic schedule types (Basic, By Availability, Advanced, Preset) generate shifts on their own.
Possible Issues and Solutions
| Issue | Possible Cause | Solution |
|---|---|---|
| “Create schedule” button is not visible | Insufficient permissions | Confirm you have Admin, Owner, or Manager access to the project |
| Date range exceeds 3 months | The system enforces a maximum period | Shorten the date range to 3 months or less, then extend later if needed |
| No projects available in the dropdown | No projects have been created yet | Create a project first on the Projects page |
| Schedule appears with a warning icon | The schedule’s end date has passed | Extend the schedule or create a new one for the upcoming period |
| Cannot see employees after creating the schedule | Employees are not assigned to the selected project | Assign employees to the project before creating the schedule |