Before creating schedules and assigning shifts, add employees to your company. Shifton allows you to add them one by one or import from an Excel file.
Step-by-Step Instructions
Step 1: Open the Employees Page
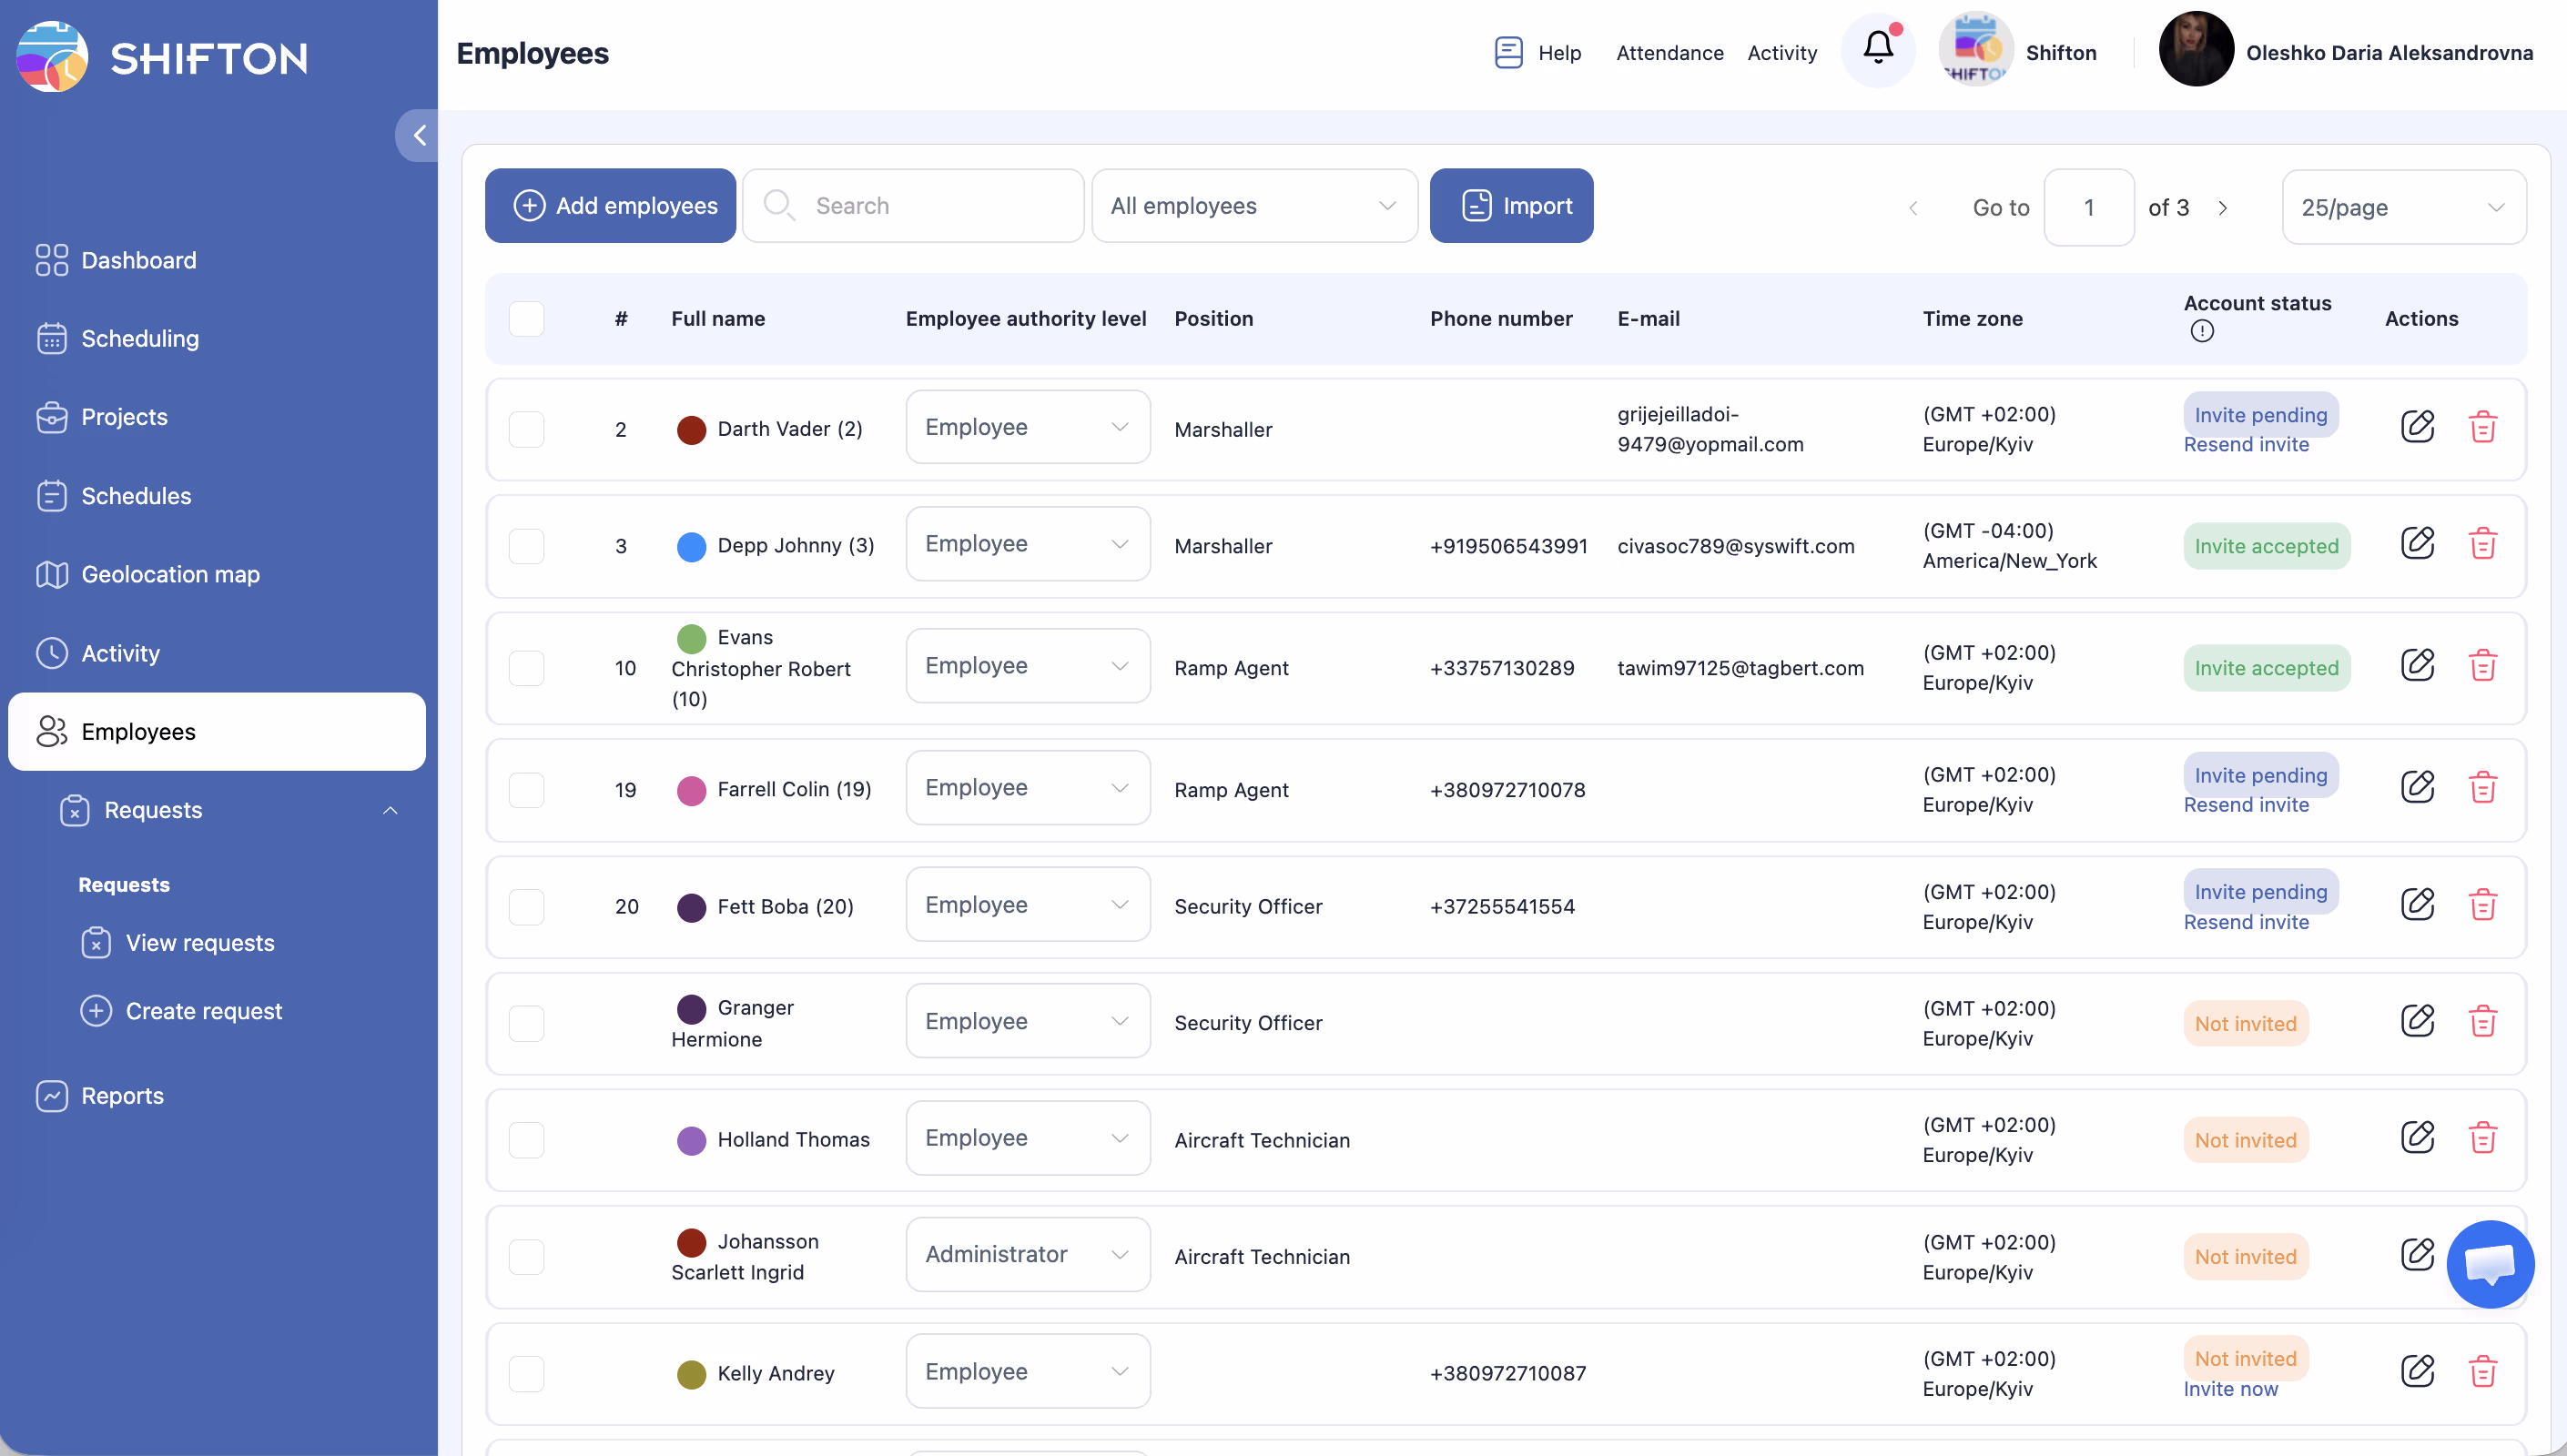
Click Employees in the left sidebar (people icon).
Step 2: Add an Employee
Click + Add employees (upper left corner). A side panel with a form will open.
Step 3: Fill in the Form
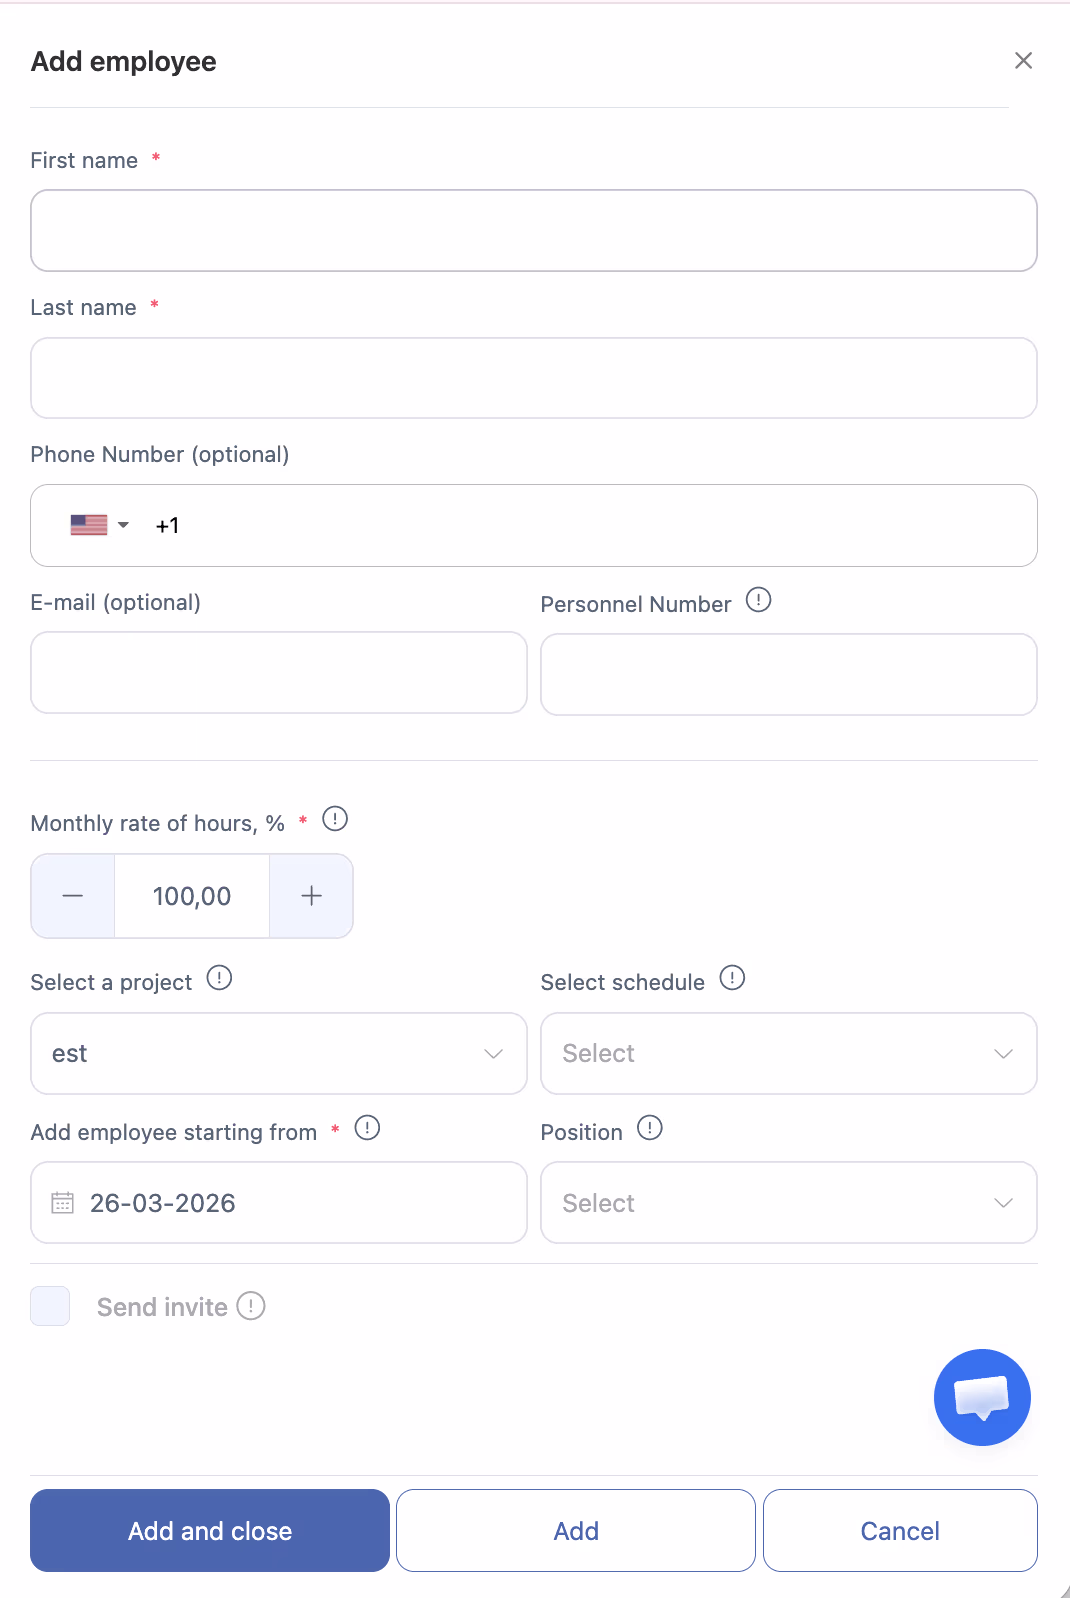
| Field | Type | Required | Default |
|---|---|---|---|
| First name | Text | Yes | — |
| Last name | Text | Yes | — |
| Phone Number | Phone + country code | No | US +1 |
| Text | No | — | |
| Personnel Number | Text | No | — |
| Monthly rate of hours, % | Number | Yes | 100.00 |
| Select a project | Dropdown | No | Your project |
| Select schedule | Dropdown | No | List of your schedules |
| Add employee starting from | Date | Yes | Today |
| Position | Dropdown | No | — |
| Send invite | Checkbox | No | Unchecked |
Step 4: Decide Whether to Send an Invitation
Check the Send invite box so the employee receives an invitation by email immediately. Without the checkbox, the status will be “Not invited” — you can invite them later.
Important: For invitations to work, the company owner must first:
1. Verify their phone number (verification)
2. Add a bank card
3. Set up a monthly payment subscription
Without completing these steps, sending invitations to employees is not possible.
Step 5: Save
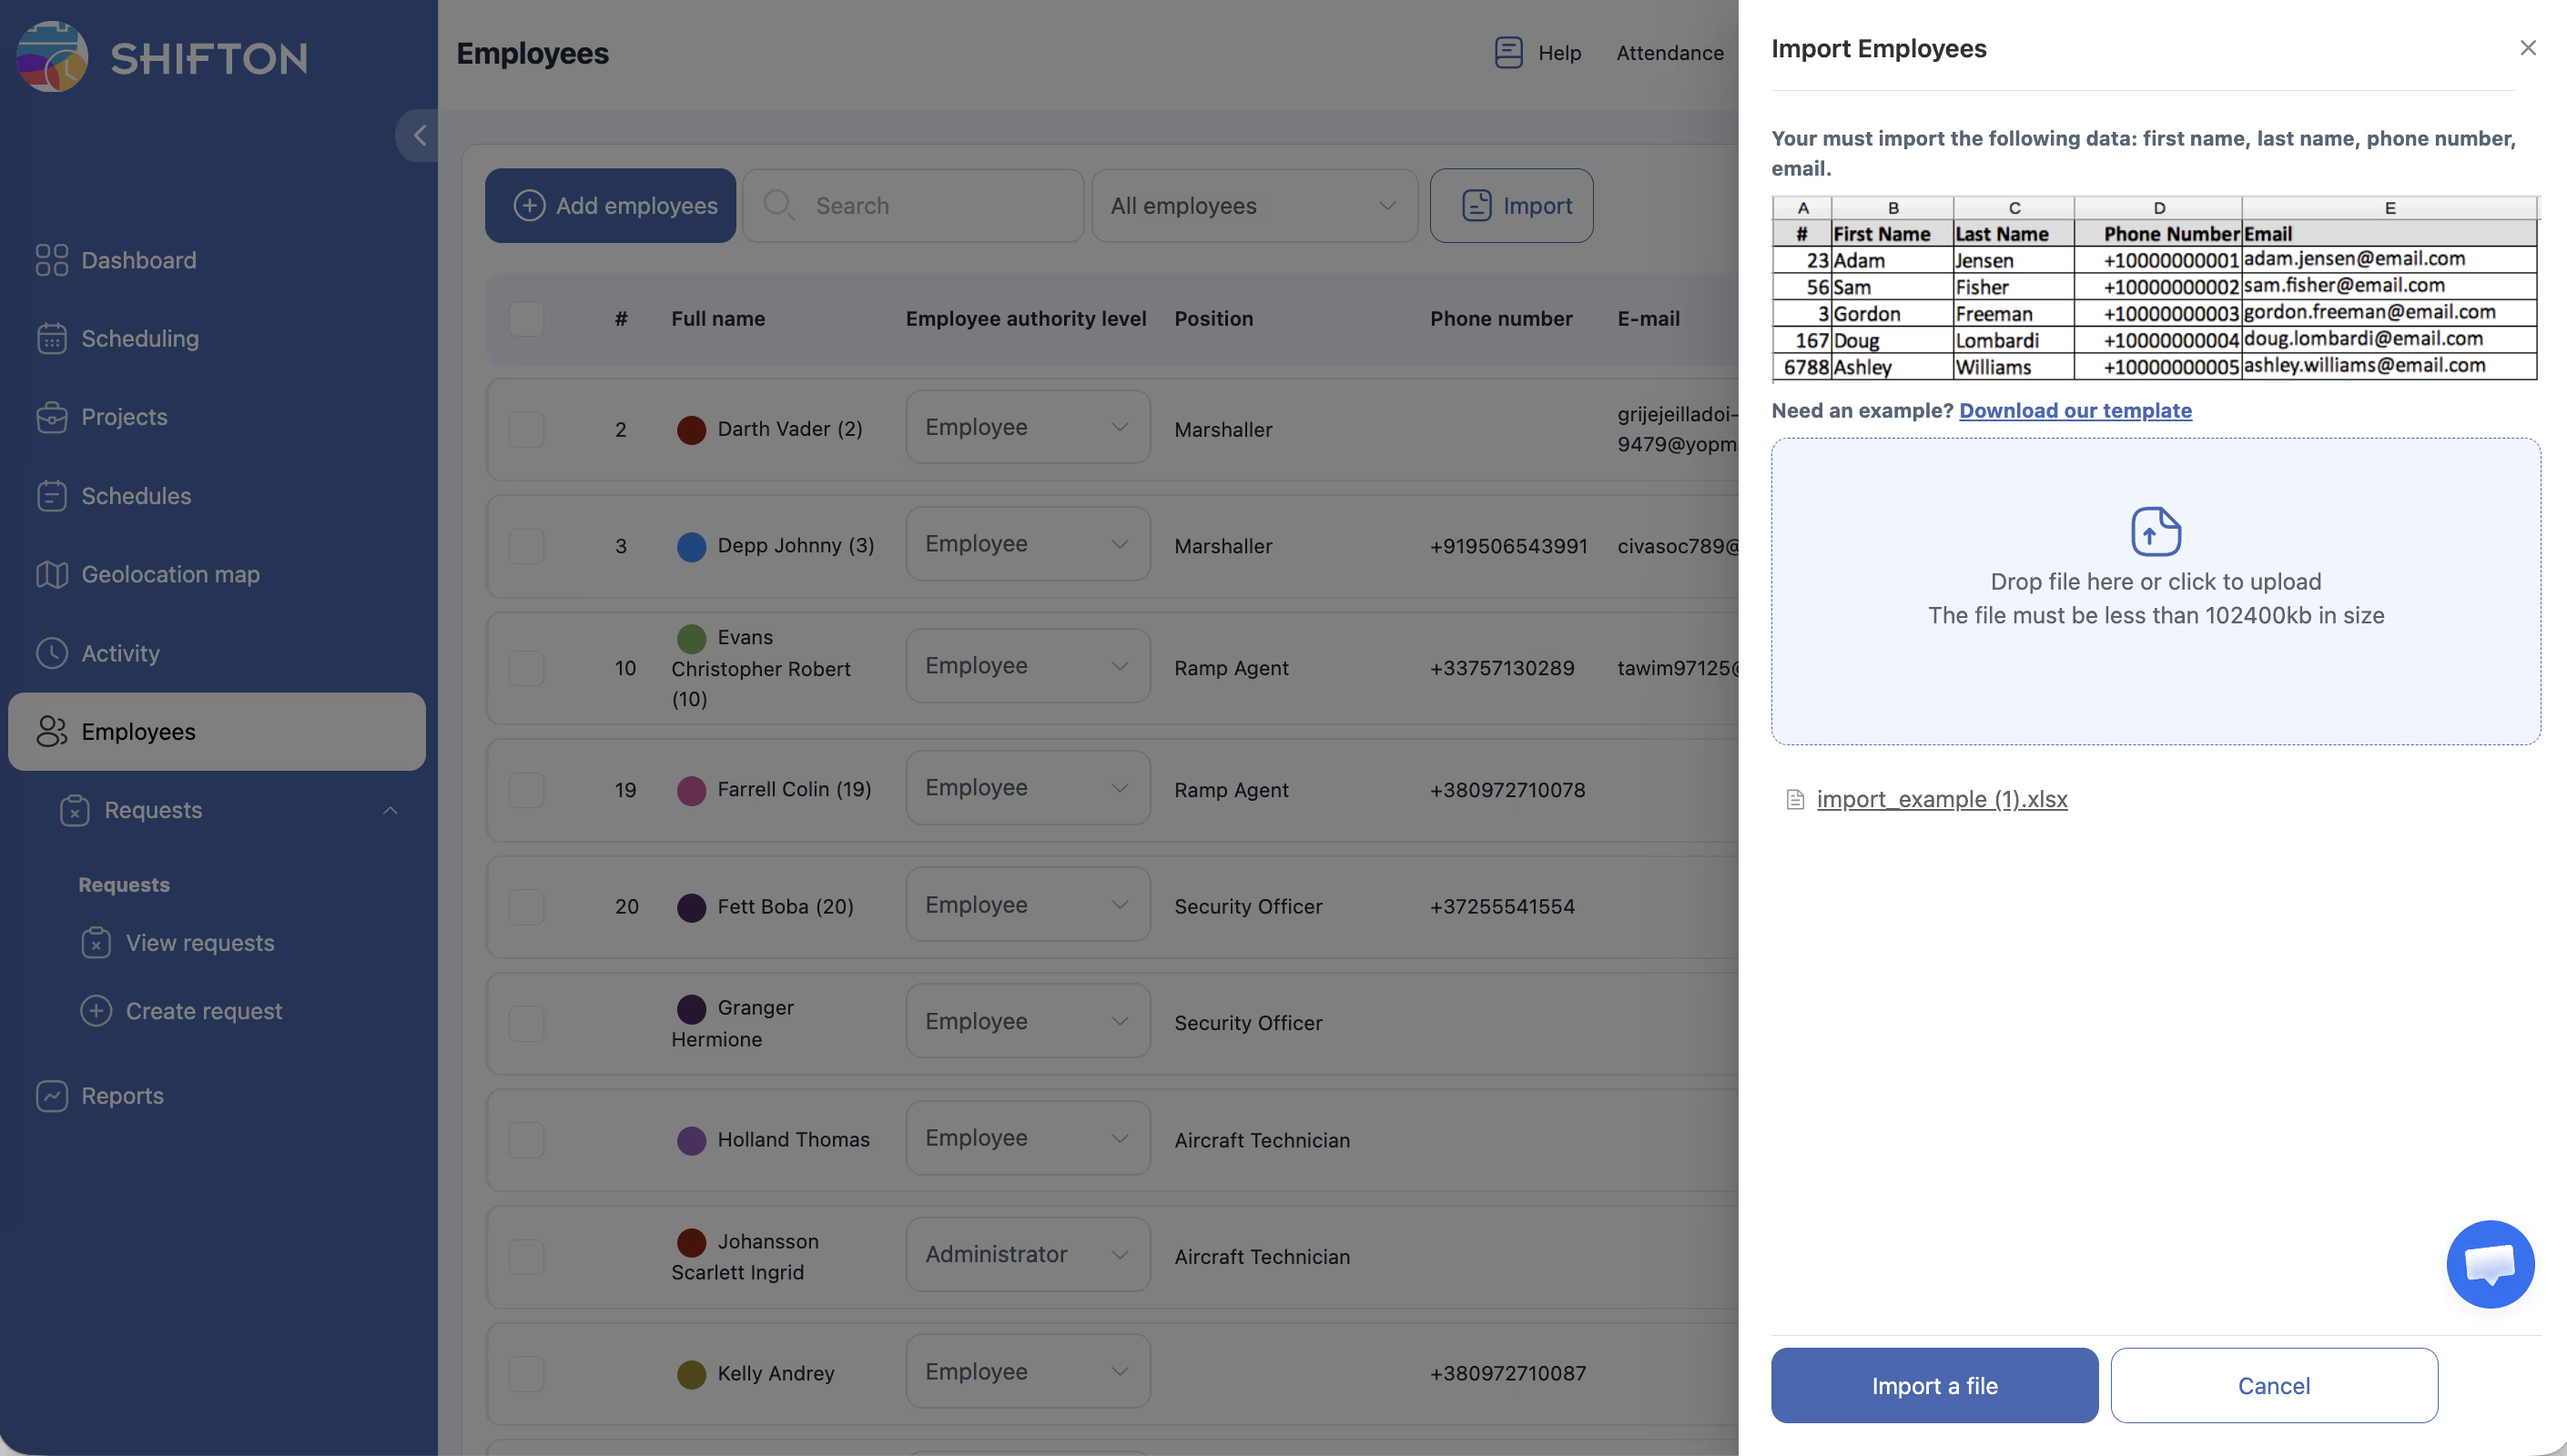
Alternative: Import from Excel
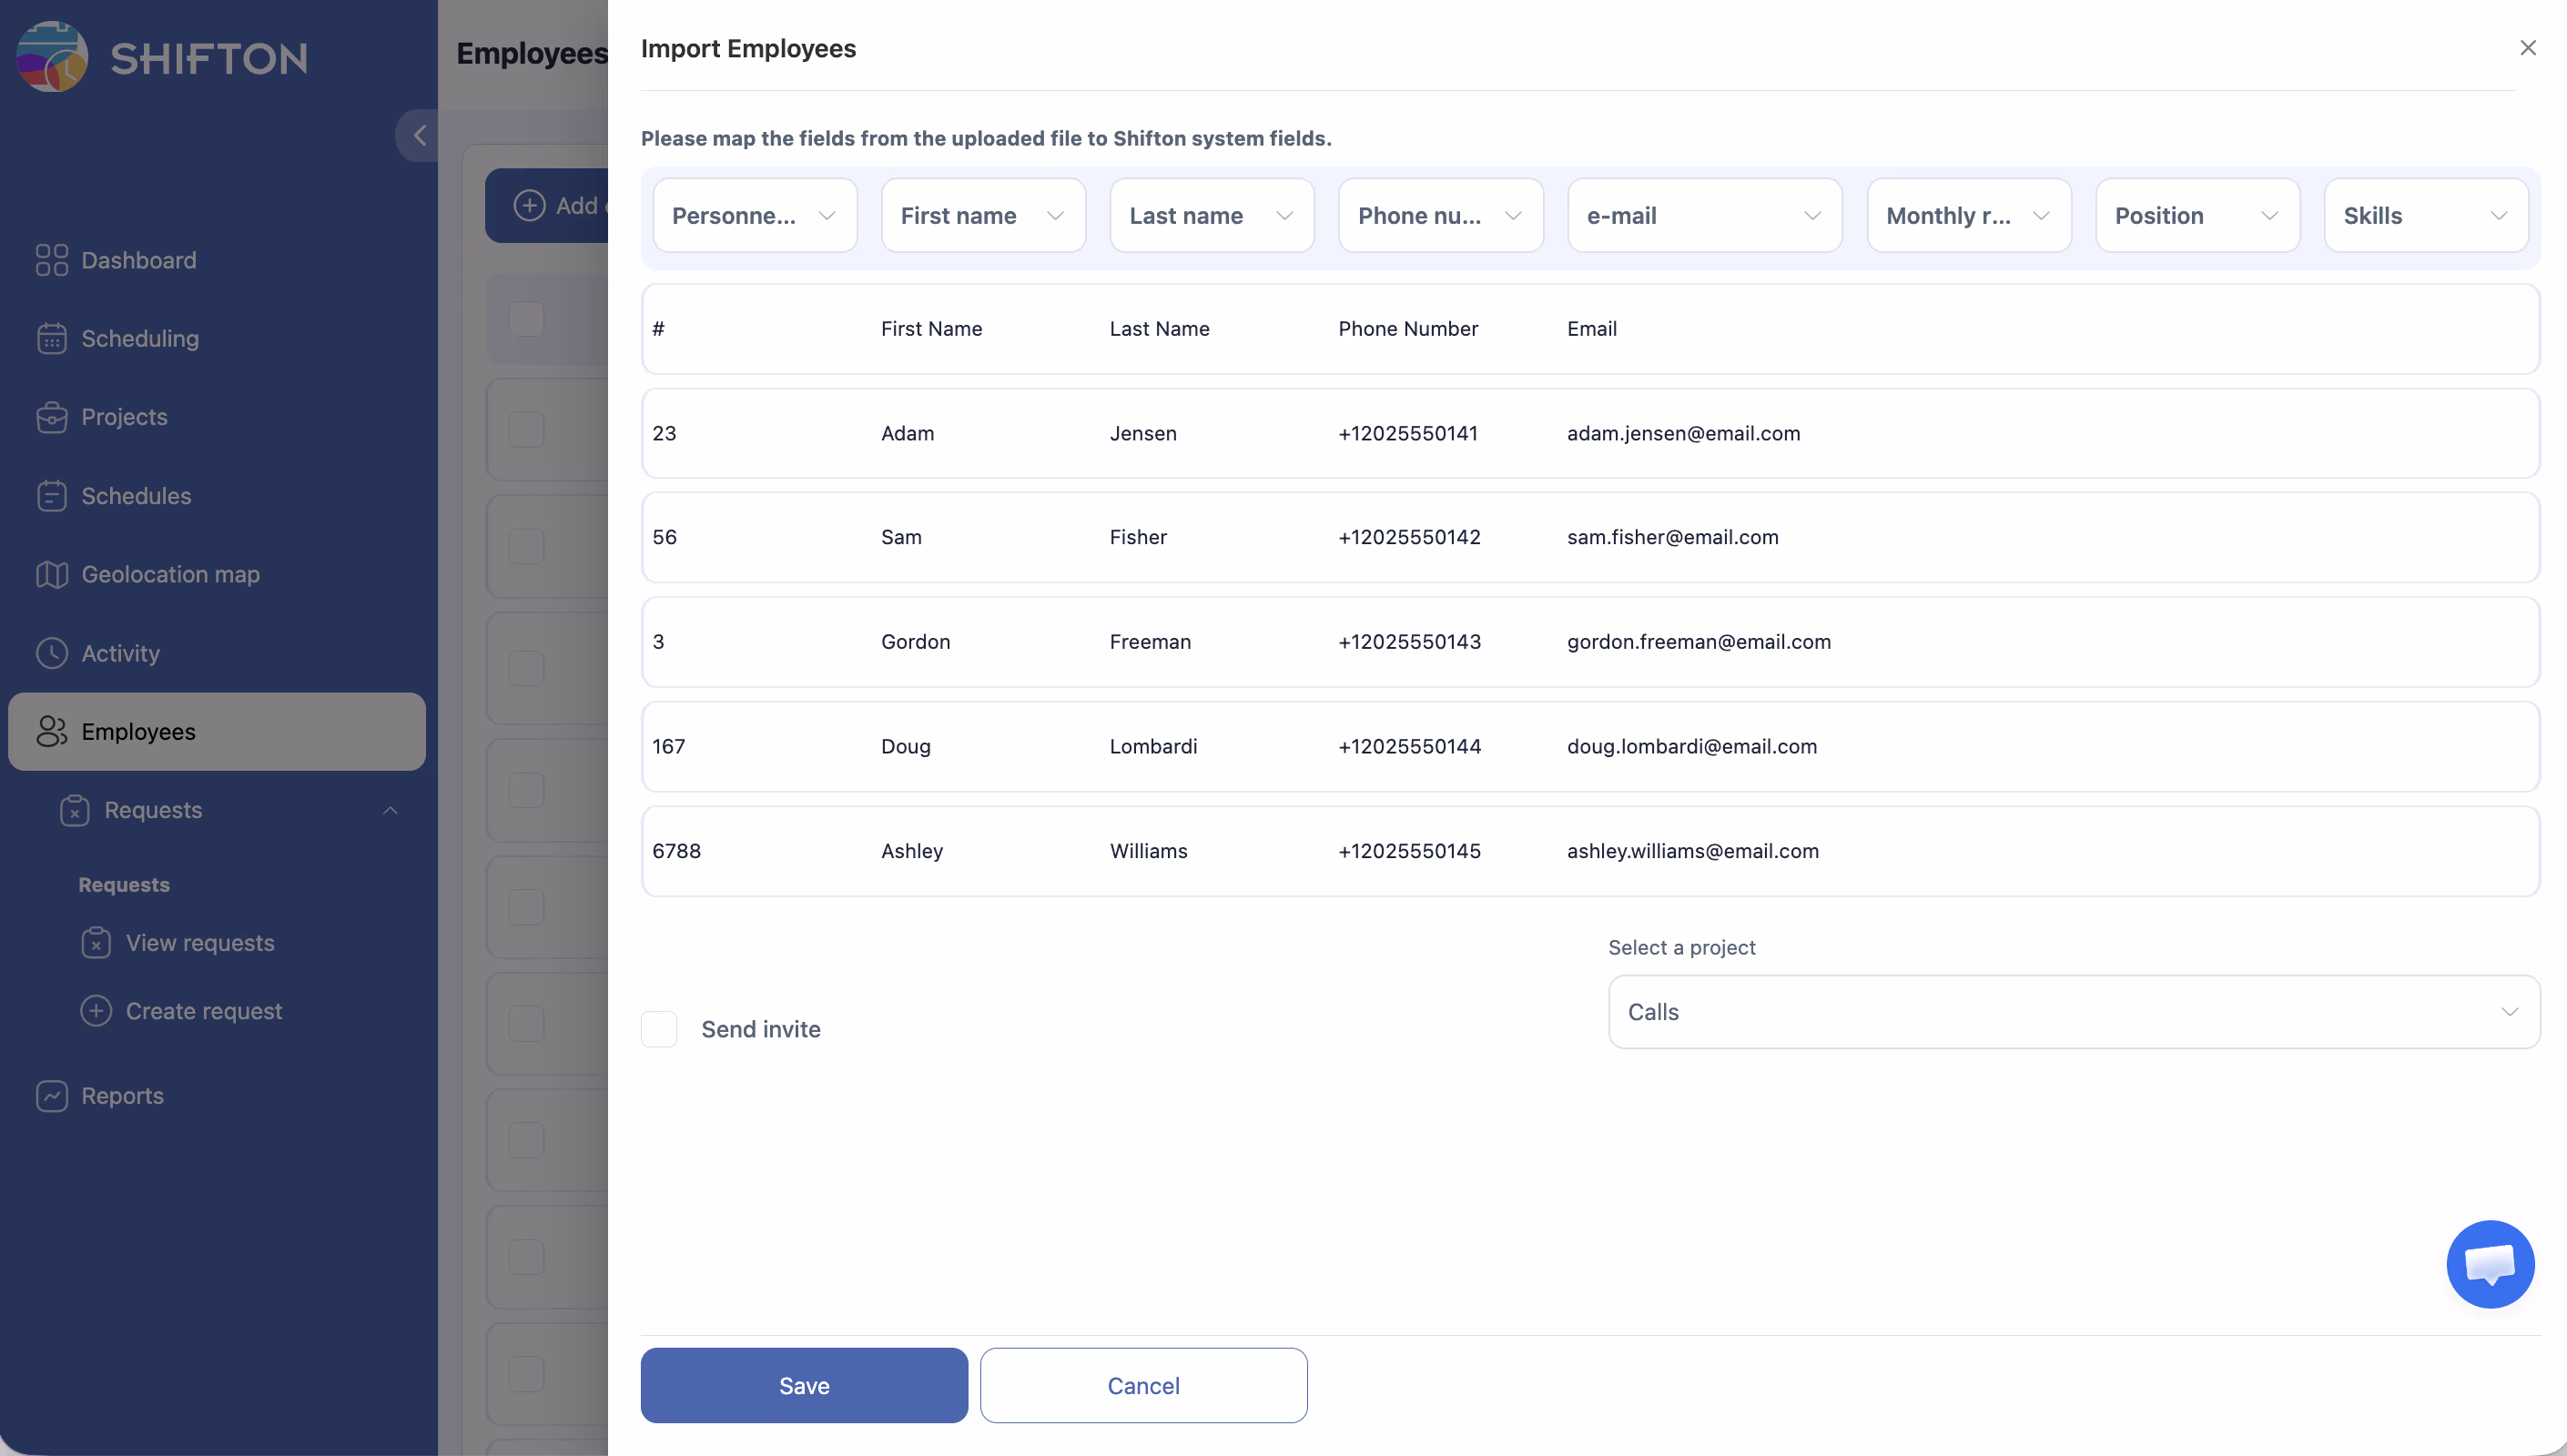
| # | First Name | Last Name | Phone Number | |
|---|---|---|---|---|
| 23 | Adam | Jensen | 12025550141 | [email protected] |
| 56 | Sam | Fisher | 12025550142 | [email protected] |
Account Statuses

| Status | Color | Description |
|---|---|---|
| Invite pending | Blue | Invitation sent, not accepted |
| Not invited | Red | Employee added, not invited |
| Invite accepted | Green | Employee accepted the invitation |
In the Account status column, Resend invite and Invite now are available.
Related Articles
- Step-by-Step Setup Guide
- Phone Verification
- Creating Your First Project and Schedule
- Payment Methods
- SMS Notifications
- Managing Projects
- Managing Positions
FAQ
Q: Is there a limit on the number of employees?
A: There is no hard limit, but billing depends on the number of active employees.
Q: What does “Monthly rate of hours, %” mean?
A: The percentage of full-time working hours. 100% — full-time, 50% — half-time.
Q: Can I add an employee without an email?
A: Yes. An invitation can be sent either by email or by SMS to the phone — one of the two is sufficient.
Q: An employee is not receiving the invitation.
A: Check the email address, ask them to check the spam folder, use Resend invite.
Q: Error when importing a file.
A: Make sure you are using the provided template and that required fields (first name, last name) are filled in.
Q: How do I resend an invitation?
A: On the Employees page, find the employee → in the Account status column, click Resend invite.
Q: What happens if I close the add employee form by clicking “Add” without “Add and close”?
A: The panel stays open — you can immediately add the next employee without reloading the form.
Q: Can I assign a schedule to an employee right when adding them?
A: Yes. The add form has Select a project and Select schedule fields — select the desired values before saving.
Q: How do I change an employee’s start date?
A: Open the employee profile → General tab → Add employee starting from field. Or specify the desired date when initially adding.
Q: How many employees can be imported at once?
A: There is no limit on the number of rows in the file. Use the import_example.xlsx template and fill in all required fields.
Q: Does an employee need to accept the invitation to appear in the schedule?
A: No. You can add an employee to a project and schedule immediately after creation, regardless of invitation status.
Q: Can I add an employee without a project and schedule?
A: Yes. Project and schedule are not required when adding — you can assign them later through the employee profile.
Q: How do I invite an employee if they don’t have an email?
A: Enter a mobile phone number — the invitation will be sent via SMS.
Q: What does the “Personnel Number” field mean?
A: An internal employee ID number for your record-keeping needs. It does not affect system functionality and is used in reports.
Q: Can I delete an employee from the system?
A: Yes. Open the employee profile and select the delete action. A deleted employee will be displayed in the schedule with a “(deleted)” label.
Q: How do I bulk-assign employees to a project?
A: Open Projects → select a project → Employees field → select multiple employees via multi-select → save.
Q: Can I change an employee’s role after adding them?
A: Yes. Open the employee profile → change the role (Employee, Manager, Admin) → save.